

Remember those irreplaceable moments captured on VHS tapes? Now is the perfect time to preserve them with a reliable vhs to cd converter. Imagine reliving family gatherings, childhood milestones, and special celebrations in crystal-clear digital quality.
This guide walks you through every step needed to convert your VHS tapes to CD in 2025. You will discover the best equipment, expert preparation tips, and the easiest ways to avoid common pitfalls.
Curious how to keep your memories safe for generations? Let’s unlock the secrets to seamless conversion and lasting preservation.
Understanding VHS to CD Conversion: Why It Matters in 2025
Remember gathering around the TV to watch your favorite family moments on VHS? Those tapes hold memories you can’t replace. Yet, VHS players are now rare, and every year, more tapes quietly lose their quality on the shelf. The push to preserve these treasures has never been more urgent.
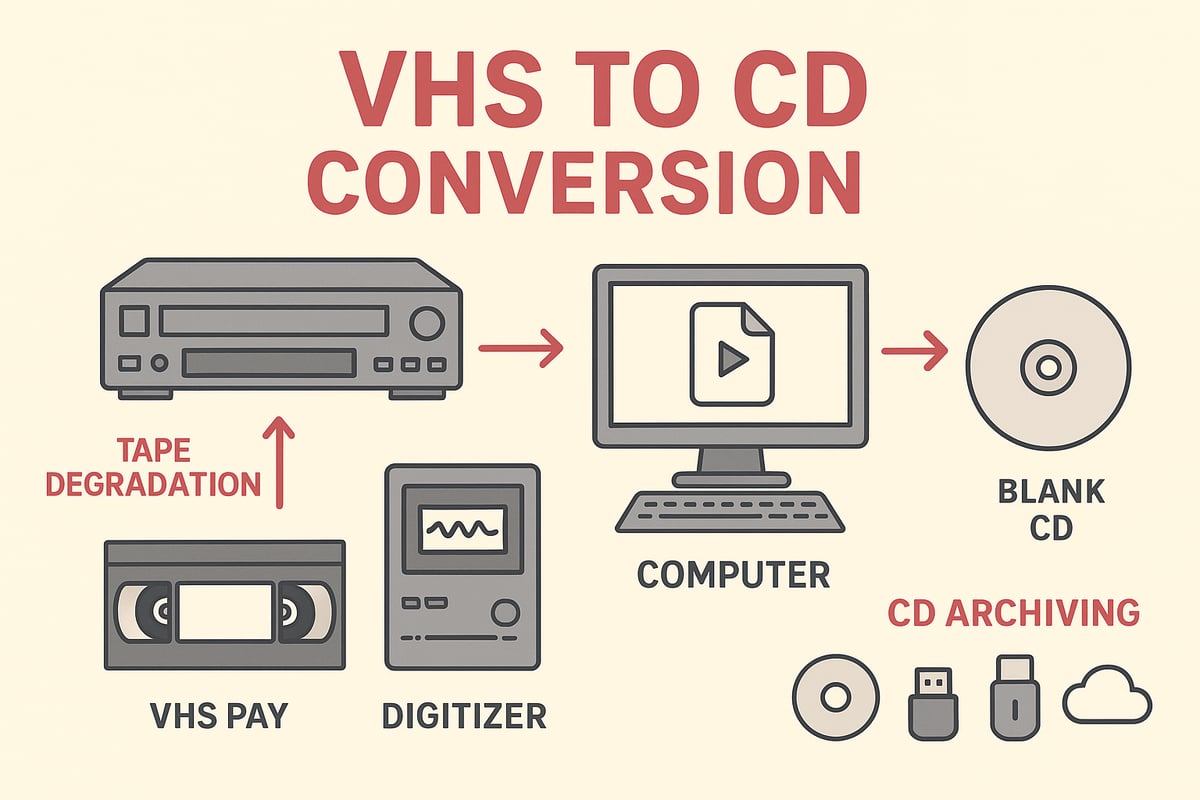
The truth is, VHS tapes are fragile. Over time, they fall victim to tape degradation, magnetic loss, and even mold. According to recent studies, more than 60% of U.S. households still own VHS tapes, but only a fraction have converted them to digital. Many families have lost footage forever due to neglect or damaged tapes. If you want to keep your memories safe, acting now is key. Learn more about the dangers and shelf life of VHS tapes in this VHS tape lifespan and degradation risks guide.
Let’s compare your options for saving these videos. CDs, DVDs, USB drives, and cloud storage all offer ways to digitize footage, but each has its own pros and cons:
| Format | Longevity | Ease of Sharing | Compatibility | Cost |
|---|---|---|---|---|
| CD | 20+ years | Moderate | High | Low |
| DVD | 20+ years | Moderate | High | Low-Moderate |
| USB Drive | 10+ years | High | Very High | Moderate |
| Cloud | Varies | Very High | Very High | Ongoing |
A vhs to cd converter stands out for those who want a simple, reliable solution. CDs last for decades, are easy to store, and play on most computers and disc players. They let you share home movies with relatives, gift a copy to a friend, or keep a safe backup without monthly fees.
Who benefits most from a vhs to cd converter? Families with irreplaceable home videos, history buffs archiving old events, creators preserving footage, and nostalgia collectors protecting rare finds. Imagine a parent reliving their child’s first steps or an artist restoring a long-lost project. With the right vhs to cd converter, these moments are safe for the next generation.
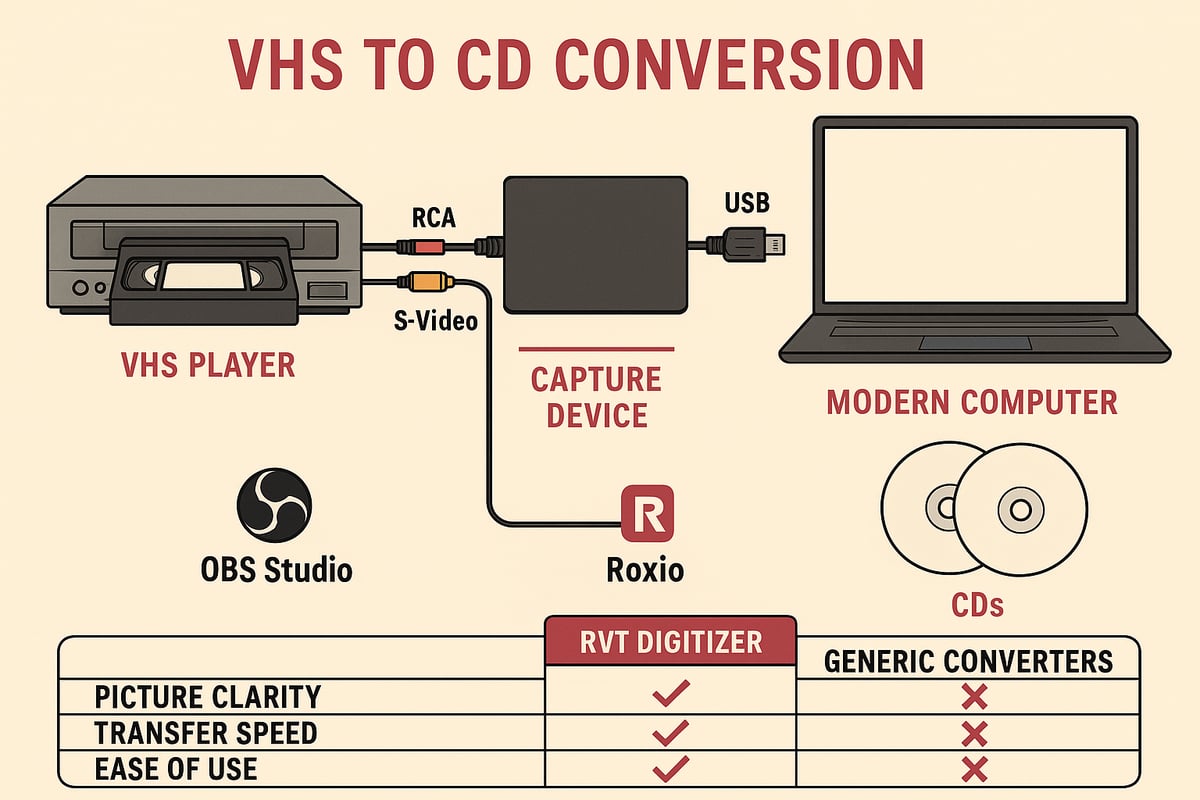
Still, not all converters are created equal. The RVT Digitizer leads the industry, offering superior picture clarity, true-to-life color, and crisp audio. Its plug-and-play design makes setup easy for anyone, from busy parents to tech-savvy archivists. Unlike generic alternatives, the RVT Digitizer uses advanced encoding chips for stable, professional-grade results, ensuring your memories are captured at their very best.
Choosing the right vhs to cd converter is more than a technical decision. It’s about trust, quality, and peace of mind. Take the step to preserve your legacy—your future self and your family will thank you.
Essential Equipment and Software for VHS to CD Conversion
Preserving your home movies starts with the right tools. Choosing the best vhs to cd converter and related equipment ensures your memories are transferred with clarity and reliability. What do you need to get started? Let’s break down the essentials, so every precious moment makes it to CD safely.
Core Hardware: What You Need
Every vhs to cd converter setup requires a few basics:
- A functioning VHS player in good condition.
- A video capture device, ideally with USB output.
- A computer (laptop or desktop) with a CD writer.
- Blank, high-quality CDs (archival grade recommended).
When comparing capture devices, the RVT Digitizer stands out. It delivers unmatched picture clarity, color accuracy, and audio fidelity. Its advanced encoding chip preserves every detail, even from older tapes. Unlike generic models, the RVT Digitizer offers plug-and-play simplicity for beginners and pros alike. Families and creators trust it for reliable, lasting results. For an easy way to compare models and features, explore the Best VHS to Digital Converter Options.
Software Choices and System Requirements
To convert VHS footage, you need video capture software. Programs like OBS Studio are popular for their flexibility and real-time monitoring. For burning video files to CD, options like Roxio and Nero provide user-friendly interfaces and robust data verification.
Your computer should meet these minimum specs:
- Windows 10 or macOS 12 (or newer)
- At least 8GB RAM and a modern processor (Intel i5/Ryzen 5 or better)
- Sufficient storage for large video files (50GB+ recommended)
- A reliable CD writer
Software compatibility is key. Most vhs to cd converter solutions work with Windows and Mac, and some support Linux. Always check software requirements before you begin.
Cables, Adapters, and Backup Storage
Connecting your VHS player to the capture device typically requires RCA or S-Video cables. For newer computers, a USB interface is essential. Quality cables prevent signal loss and ensure stable transfers.
Do not overlook backup storage. Use external hard drives or cloud solutions to save your digital files before burning to CD. This protects against accidental loss and makes sharing easier.
Here are the common cables you’ll need:
- RCA (red, white, yellow) for standard video and audio
- S-Video for enhanced picture quality (if your player supports it)
- USB cable for computer connection
Budget vs. Professional Setups
A basic vhs to cd converter setup using generic hardware may work for casual projects, but results can vary. Lower-quality converters often introduce video noise or syncing issues. In contrast, the RVT Digitizer’s professional-grade build and precision engineering yield consistent, high-quality output.
Consider this example: A family digitizing wedding tapes with a budget device noticed color fading and sound dropouts. After switching to the RVT Digitizer, they enjoyed vibrant playback and crystal-clear audio, preserving their memories for future generations.
For creators and collectors, investing in reliable equipment saves time and frustration. The right vhs to cd converter means fewer errors, smoother workflow, and peace of mind knowing your videos are safe for years to come.
Preparing Your VHS Tapes and Workspace
Preserving your memories starts long before you press record on your vhs to cd converter. A little preparation can make the difference between a flawless transfer and a lost moment. Before you begin, set aside time to get your tapes, workspace, and equipment ready for the best results.
Inspecting and Cleaning VHS Tapes
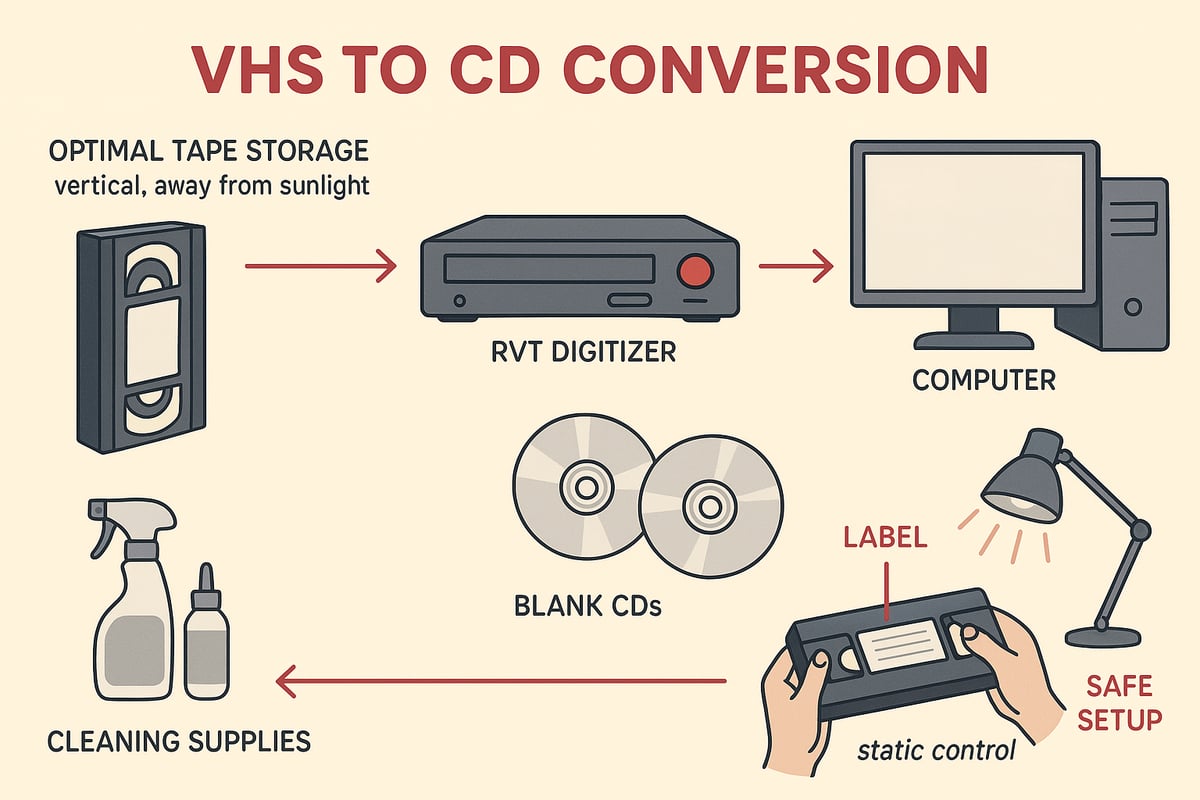
Start by gently inspecting each VHS tape. Look for dust, mold, or warping. If you spot white spots or fuzzy patches, that could be mold—a common threat to old tapes. Use a soft, lint-free cloth or a purpose-made VHS cleaning tool to wipe the cassette exterior. Avoid liquid cleaners, as moisture can damage the magnetic tape inside.
If you encounter stubborn dirt, carefully open the tape shell (if you feel confident) and use compressed air to remove particles. For severe issues like mold or sticky residue, consult a professional before running the tape through your vhs to cd converter. Cleaning your tapes not only protects your equipment but also ensures the RVT Digitizer captures every frame in vivid detail. For a step-by-step guide on safely preparing tapes, check out Convert VHS Tapes to Digital.
Organizing and Labeling for Easy Conversion
Organization saves time and prevents mistakes. Sort your VHS tapes by date, event, or importance. Create a simple spreadsheet or use sticky notes to track tape contents and their order.
Before you insert a tape into your vhs to cd converter, label it clearly. Write the recording date, event name, and any special notes on both the tape and a case insert. This makes it easy to match your digital files to their original source after conversion. Many families find that a little organization upfront means fewer headaches and more time reminiscing with their digitized memories.
Setting Up Your Workspace and Equipment
A good workspace is just as important as clean tapes. Choose a spot with stable power, soft lighting, and enough ventilation to keep your equipment cool. Place your VHS player, RVT Digitizer, computer, and blank CDs on a clean, static-free surface.
Before starting, clean the VHS player's heads with a cleaning cassette. This prevents streaks or dropouts during playback. Make sure your vhs to cd converter is connected using the correct cables and check that your computer recognizes every device. A clutter-free setup means fewer distractions and smoother transfers, especially with professional-grade equipment like the RVT Digitizer.
Safety, Backup, and Troubleshooting
Handle tapes and equipment with care. Keep magnets, liquids, and food away from your workspace. Always eject tapes gently to avoid damage.
It's wise to make a backup of your original tapes before attempting conversion, especially if they are fragile or irreplaceable. Consider saving two digital copies—one on CD and one on a hard drive or cloud storage. If you notice playback issues, stop and inspect both the tape and your vhs to cd converter. Sometimes, a quick head cleaning or cable check solves the problem.
Preparing your tapes and workspace is the foundation of a successful conversion. With the RVT Digitizer as your trusted vhs to cd converter, you can confidently move to the next step, knowing your memories are safe and ready for a new digital life.
Step-by-Step Instructions: Converting VHS to CD in 2025
Preserving your precious memories is easier than ever with the right approach. This step-by-step guide will walk you through the full VHS to CD conversion journey. Whether you are saving family moments or archiving creative projects, following these steps ensures your videos last for generations.
Step 1: Setting Up Your Equipment
Start by gathering all the essential hardware for your VHS to CD converter setup. The core items include:
- A working VHS player in good condition
- The RVT Digitizer for best-in-class video transfer
- Quality RCA or S-Video cables, plus a USB cable
- A computer with up-to-date drivers and sufficient storage
- Blank archival-grade CDs and a reliable CD burner
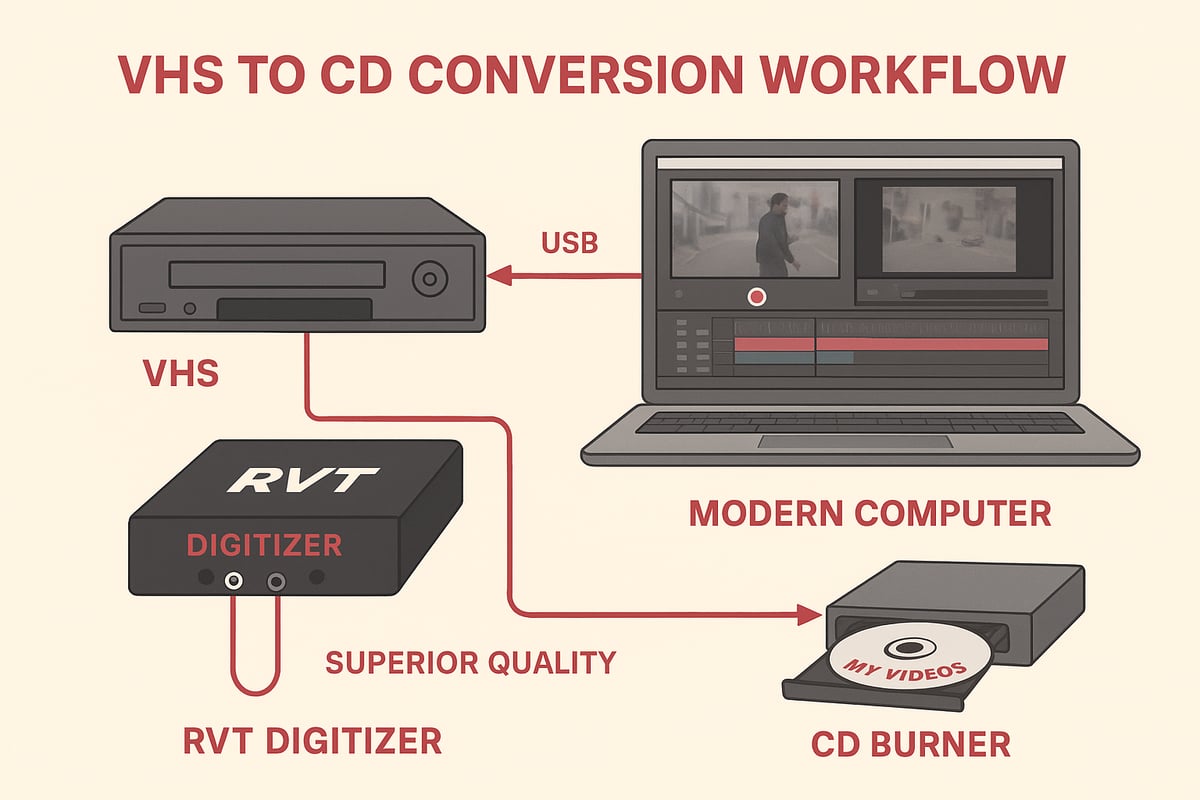
Connect your VHS player to the RVT Digitizer using the appropriate cables. Plug the digitizer into your computer via USB. The RVT Digitizer stands out with its plug-and-play design, saving time and reducing setup errors compared to generic converters.
Install your chosen video capture software. Programs like OBS Studio or Roxio are user-friendly and compatible with most systems. Confirm your computer detects the RVT Digitizer and all drivers are current. This ensures a smooth transfer and protects your memories from technical hiccups.
If the computer fails to recognize your vhs to cd converter, try switching USB ports or restarting the software. Keeping cables secure and using the RVT Digitizer’s advanced encoding chip minimizes connection issues. Families and creators love how this setup speeds up the process and delivers consistent, high-quality results.
Step 2: Capturing and Digitizing VHS Footage
With your vhs to cd converter ready, insert your first VHS tape. Cue up the footage you want to preserve. Press play on the VHS player and start the video capture in your software.
Monitor the video and audio in real time. The RVT Digitizer’s superior picture clarity and color accuracy make a visible difference, especially with older tapes. Adjust your capture settings for optimal resolution, frame rate, and file format. MP4 is often the best choice for quality and compatibility.
Here is a typical capture settings example:
Resolution: 720x480
Frame Rate: 29.97 fps
Format: MP4 (H.264)
Audio: 44.1 kHz, Stereo
Watch for dropped frames or audio sync problems. The RVT Digitizer’s advanced chip reduces these issues. If you encounter persistent problems, check the tape for damage or clean the VHS player heads.
For a detailed walkthrough on capturing VHS to your computer, check out the Capture VHS to PC Guide.
Remember to save your digital file to a secure location. Using the vhs to cd converter effectively means reviewing each file after capture, ensuring every moment is preserved before moving to the next step.
Step 3: Editing and Enhancing Video Files
Now that your footage is digitized, it is time to polish and organize it. Import your files into video editing software like Adobe Premiere, DaVinci Resolve, or iMovie. The vhs to cd converter process benefits from even minor enhancements.
Trim away blank sections or static. Restore faded colors and boost sound clarity. The RVT Digitizer’s high-quality transfers make these corrections easier, preserving the authenticity of your memories.
Add titles, chapters, or metadata for easy navigation. This is especially helpful for family events or creative projects. Use built-in noise reduction or stabilization tools if needed.
Here is a quick fix for faded colors:
- Open color correction tools
- Adjust brightness and contrast
- Increase color saturation gently
- Preview before saving changes
If you have multiple tapes, organize footage by date or event. The vhs to cd converter workflow is smoother when files are labeled and grouped logically. Families often enjoy reliving restored moments together, while creators appreciate the professional results.
Step 4: Burning Video Files to CD
With your videos edited, you are ready to use your vhs to cd converter setup for burning. Choose a reliable CD burning software—Nero, Roxio, or the built-in tools on your system are good options.
Decide on the CD format:
| Format | Video Quality | Compatibility | Notes |
|---|---|---|---|
| VCD | Standard | Most players | Up to 74 min per disc |
| SVCD | Higher | Fewer players | Up to 35 min per disc |
| Data CD | Highest | Computers | Flexible file size |
Organize your video files and create menus or chapters if desired. This makes playback more user-friendly. Begin the burning process, and verify the data once complete.
Tips to ensure a successful burn:
- Use archival-grade CDs for longevity
- Burn at a slower speed to reduce errors
- Double-check file compatibility with your devices
The RVT Digitizer ensures that the video files you burn retain their original clarity and sound fidelity. If you encounter write errors, try using a different brand of CD or adjusting burn speed. Using a trusted vhs to cd converter setup means fewer failed discs and more preserved memories.
Step 5: Testing and Storing Your CDs
The final step in the vhs to cd converter process is testing and storage. Play your CDs on several devices—DVD players, computers, and standalone CD players—to confirm compatibility. Look for smooth playback, clear video, and synchronized audio.
Label each disc clearly with the date, event, and content details. Use a soft-tip marker designed for CDs to prevent damage. Store your discs in jewel cases or archival sleeves.
Best practices for storage:
- Keep CDs in a cool, dry, dark place
- Avoid stacking or scratching discs
- Use archival-grade materials for maximum lifespan
Many families have shared how their vhs to cd converter journey brought generations together to relive home movies. With the RVT Digitizer, your digital memories are safe, accessible, and ready to share for years to come.
Troubleshooting Common Issues and Expert Tips
Even with the best vhs to cd converter, unexpected hiccups can arise. Maybe your video stutters, the audio drifts out of sync, or your computer refuses to recognize the capture device. The good news? Most issues have simple fixes. Choosing a high-quality solution like the RVT Digitizer can prevent many headaches from the start, thanks to its advanced encoding and reliable plug-and-play design.
Quick Troubleshooting Table
| Problem | Likely Cause | Solution |
|---|---|---|
| No video/audio signal | Loose cables, driver issue | Check cables, update drivers, restart software |
| Audio/video out of sync | Slow PC, low-quality device | Use RVT Digitizer, close other programs |
| Poor video quality | Dirty heads, old tapes | Clean VCR heads, inspect tapes, upgrade device |
| Burning errors | Bad CDs, software glitch | Try new CD, update burning software |
| Unreadable CD | Incompatible format | Burn as data CD, test on different players |
Many vhs to cd converter issues happen during capture. If your VHS player is not detected, check every cable and make sure drivers are current. The RVT Digitizer's professional-grade build and U.S.-based support can make setup easier, but generic devices often need manual driver installs. If you see static or color loss, clean your VHS heads with a soft cleaning tape and ensure your tapes are free from mold or dust.
Audio and video sync problems occur if your computer is overloaded or your converter's chip is outdated. The RVT Digitizer’s advanced processing keeps everything aligned, even on longer tapes. For best results, close unused apps and save your work often. If you notice dropped frames, lower the capture resolution or switch USB ports.
When burning to CD, select high-quality discs and trusted software. Always verify the disc after burning. If an error pops up, try a different brand of CD or update your burning program. Archival-grade CDs can protect your memories for decades.
If your tapes are fragile or sticky, avoid forcing them into the player. Instead, consult a professional. Services like VHS to Digital Converter Service can rescue irreplaceable footage safely.
For persistent technical issues, consider comparing equipment using the Top VHS to digital converters 2025 guide. This helps you select a vhs to cd converter that matches your needs and avoids common pitfalls.
Backup is non-negotiable. Always copy your digital files to an external drive or cloud before erasing or storing your tapes. The RVT Digitizer is trusted by families and creators who want reliable results and peace of mind.
Have you ever lost a family video to a failed CD or a broken tape? With careful troubleshooting, smart choices, and the right vhs to cd converter, you can preserve your most precious moments for generations.
Preserving and Sharing Your Digitized Memories
Preserving your family’s memories doesn’t end once you’ve used a vhs to cd converter. To truly safeguard those irreplaceable moments, creating reliable backups and sharing your digital treasures is essential.
Back Up Your Treasured Memories
Once your tapes are digitized, always make at least two copies. Burn your finished videos to archival-grade CDs with your vhs to cd converter, then create digital backups on your computer or an external hard drive. Cloud storage is another smart choice, letting you access your videos from anywhere and adding a layer of protection if a physical copy is lost.
Here’s a quick comparison of storage options:
| Storage Method | Pros | Cons |
|---|---|---|
| CD/DVD | Tangible, easy to share | Prone to scratches |
| External Drive | Large capacity, fast access | Can fail or get lost |
| Cloud Storage | Accessible anywhere, automatic backup | Subscription cost |
Share With Family, Near or Far
Sharing your memories is now easier than ever. Pass along physical CDs, or upload videos to a private cloud folder for family members to enjoy. Some prefer creating private YouTube links or using family sharing apps. If you’re curious about the best ways to distribute and store your digital files, check out these helpful VHS to digital conversion FAQs for more guidance.
Imagine gathering three generations around the TV, reliving your childhood holidays or school plays. With the right vhs to cd converter, these moments become shareable and safe for years to come.
Organize, Catalog, and Protect
Label every CD with the date, event, and family members featured. Create a digital spreadsheet or folder system to catalog your files. Back up everything regularly, and store physical CDs in a cool, dry, dark place.
Legal Considerations
Before sharing, ensure you have the right to distribute any copyrighted footage. Home videos are usually fine, but old TV shows or movies may require permission.
Preserving memories with a top-tier vhs to cd converter like the RVT Digitizer gives you more than just digital files. It means peace of mind, knowing your family history is secure, organized, and ready to be enjoyed for generations.
Now that you know exactly how to bring your VHS memories into the digital era, why not take the next step and make sure those precious videos are safe for good? Imagine showing your kids or grandkids crystal clear footage from your childhood, or sharing your family’s most treasured moments without worrying about tape damage. You deserve a process that’s simple, fast, and gives you the very best quality—no stress, no lost footage. Ready to preserve your story and enjoy peace of mind, starting today? Digitize my tapes today


