
Ever wondered how to save your priceless VHS memories before they fade away? Time affects old tapes, making your favorite moments harder to relive every year.
This guide is here to help you capture vhs to pc in 2025, no tech expertise required. You’ll learn how to preserve home videos, family milestones, and retro footage with modern, reliable tools.
Inside, you’ll find a step-by-step walkthrough: what equipment you need, how to set up your workspace, the full capture process, troubleshooting tips, and best practices for keeping your memories safe for life.
Ready to protect your legacy? Let’s get started.
Understanding VHS to PC Conversion: What You Need to Know
Ever looked at your VHS collection and wondered how long those memories will last? The truth is, magnetic tape does not age gracefully. Most VHS tapes only last 10 to 30 years before losing quality. With each year, the risk of fading colors and warping sound grows. Many families have lost their only copies of childhood moments because they waited too long. Studies show that over 70% of U.S. households still own legacy tapes—now is the time to act if you want to capture vhs to pc and keep those memories safe.
Why Convert VHS to Digital Today?
VHS tapes are fragile. Over time, magnetic particles break down, and with them, your images and sound. Did you know that the average VHS tape lasts just 10 to 30 years? Many people have already lost priceless family events to this slow decay. Plus, old VCRs are becoming rare, and modern TVs or PCs rarely support analog input. If you want to share, edit, or simply watch those old videos, you need to capture vhs to pc before it is too late.
Core Equipment Checklist
To begin, gather your essentials for a smooth transfer. You will need:
- A working VHS player (VCR)
- Video capture device (USB, PCIe, or standalone)
- PC or laptop with enough storage and compatible ports
- RCA or S-Video cables for analog connection
- Reliable capture software
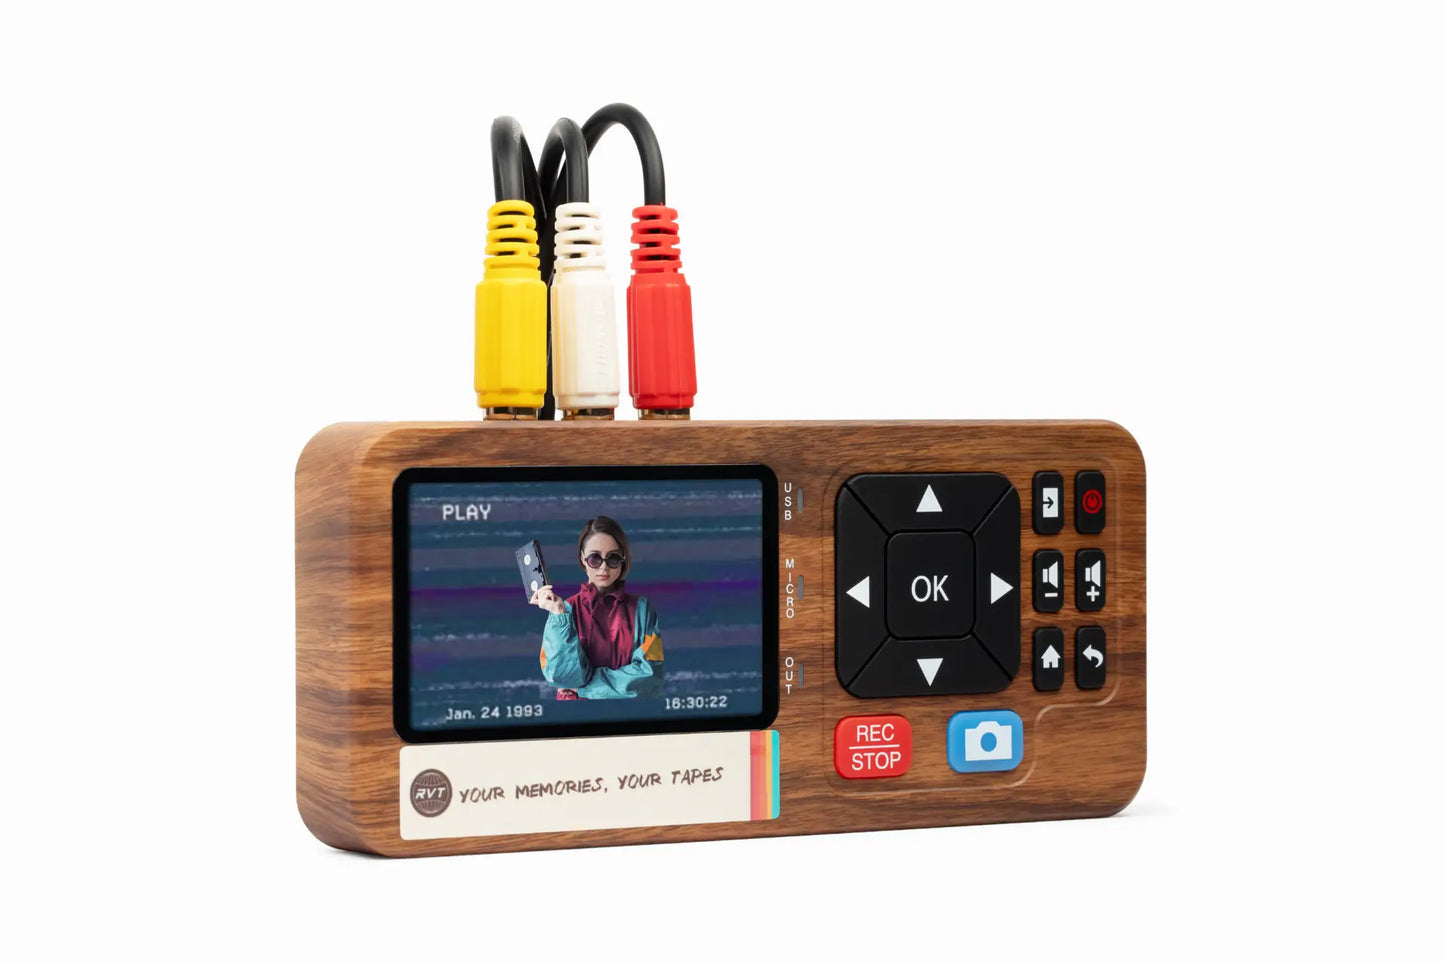
Not all devices are equal. The RVT Digitizer stands out for its exceptional clarity, fast transfer, and easy plug-and-play setup. Want to compare more options? Browse the Best VHS to Digital Converter Collection to find the right fit and confidently capture vhs to pc.
Choosing the Right Video Capture Device
Performance matters when you want archival-grade results. Look for features like high resolution, smooth frame rate, and perfect audio sync. The RVT Digitizer is the industry benchmark, thanks to its advanced encoding chip and professional-grade build. It delivers crisp, vibrant images and stable long-term files. In side-by-side tests, generic converters often miss details or cause color shifts. Families and collectors trust RVT Digitizer for its unmatched results and U.S.-based support, making it the top pick to capture vhs to pc.
Understanding Video Formats and File Types
You have choices when saving your videos. Common formats include MP4, AVI, MOV, and MPEG-2. MP4 is usually best for sharing and archiving because it balances quality and file size. For long-term preservation, choose a format that is widely supported and does not compress away detail. If you plan to edit or share with others, select a format that works across both PCs and mobile devices.
Storage and Backup Considerations
Capturing a VHS tape to your PC takes space—plan for 4 to 8GB per hour of footage. Always store files on more than one device, like an external drive and a cloud backup. Many families have lost digital videos to a single hard drive crash. To truly preserve your memories, make it a habit to back up as soon as you capture vhs to pc and check your files regularly.
Cost, Value, and Time Commitment
DIY conversion is affordable compared to sending tapes to a service. Expect to spend on a quality capture device, cables, and perhaps software. Remember, capturing is real-time—so a 2-hour tape takes 2 hours to digitize. The real value is in preserving moments you cannot replace. With RVT Digitizer, you gain speed, safety, and clarity, making every minute and dollar count.
Step 1: Setting Up Your Hardware and Workspace
Ready to preserve your memories? Setting up to capture vhs to pc is simpler than you might think. With a little preparation, you’ll be ready to transfer your home videos and ensure they last for generations. Let’s walk through the essential setup steps together.

Preparing Your VHS Player
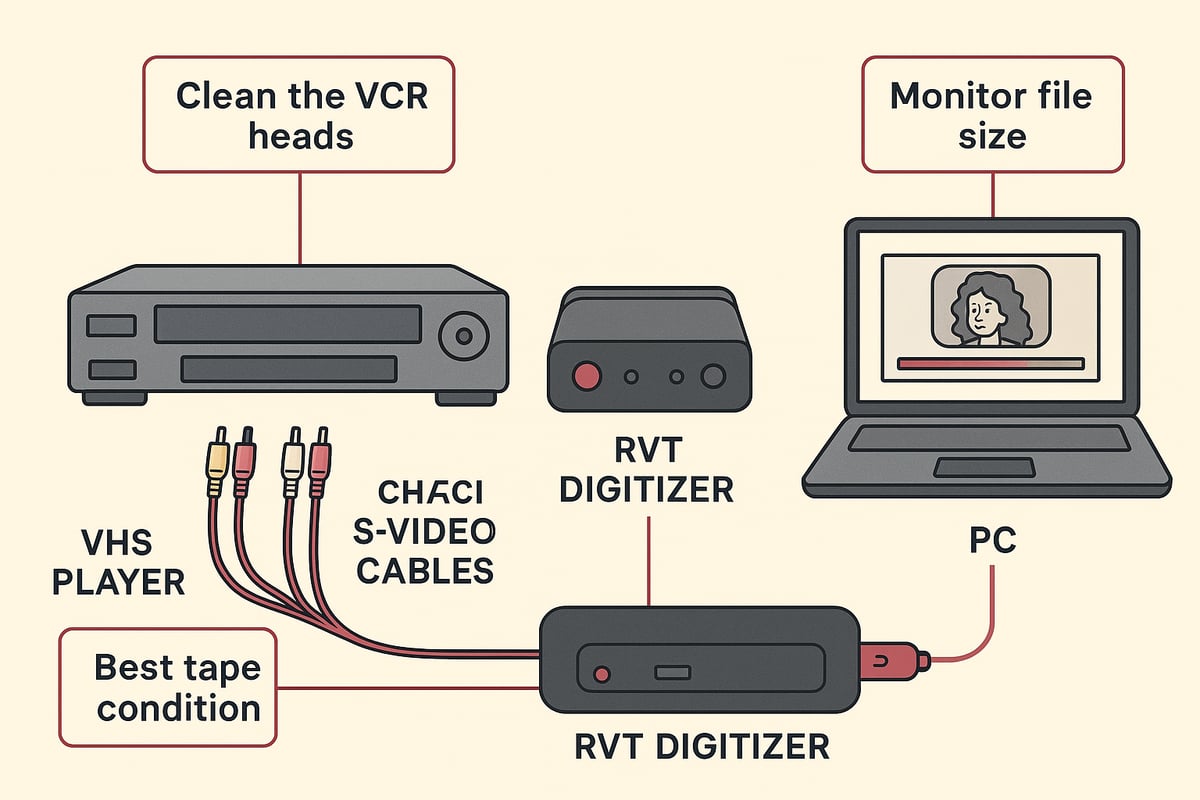
Before you start to capture vhs to pc, check your VHS player’s condition. Dust, dirt, or worn-out heads can cause poor transfers. Take a moment to:
- Clean the VCR heads with a cleaning tape or alcohol swab
- Test playback with a non-critical tape
- Check video and audio outputs for clear, steady signal
A dirty or neglected VCR may result in fuzzy or distorted footage. Imagine losing precious memories simply because the equipment was not cleaned. Always verify playback quality before connecting to your computer.
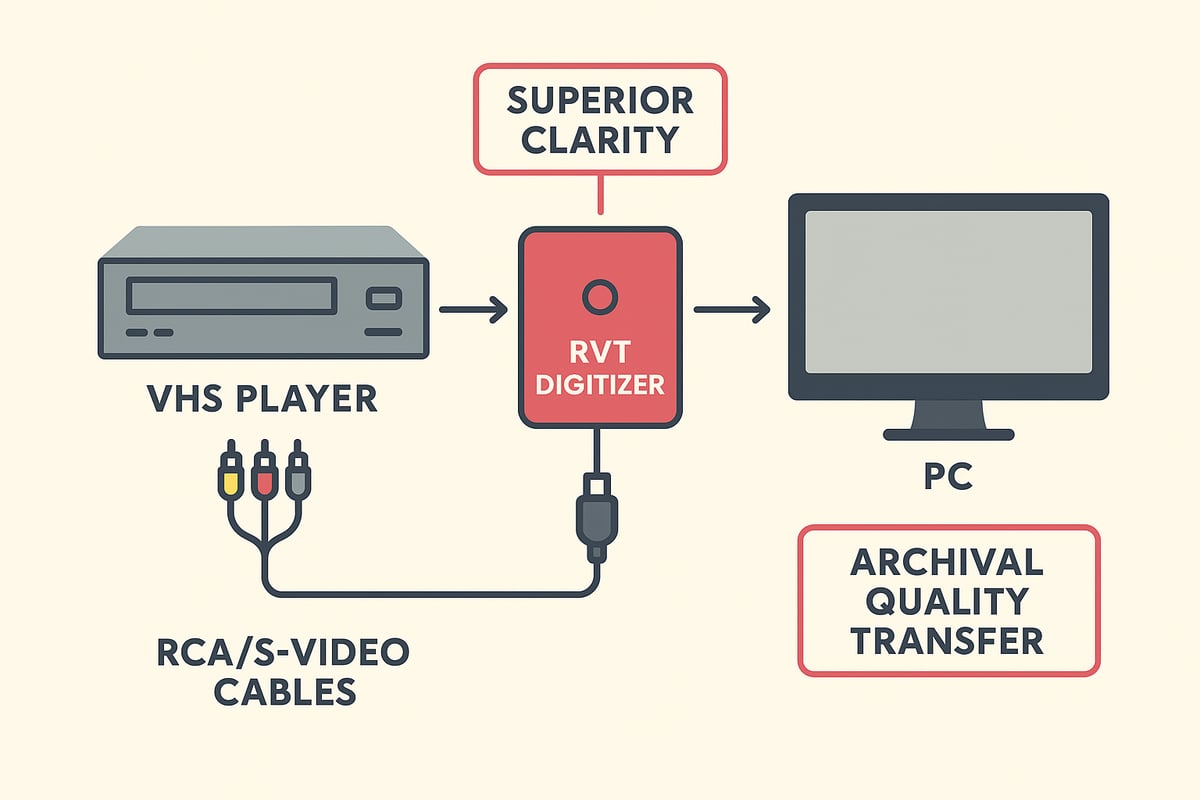
Connecting the Video Capture Device
Now, connect your VCR to the video capture device. Use RCA (yellow, red, white) or S-Video cables, matching the color codes for video and audio. Plug the cables securely into both the VCR and the capture device.
Most modern capture devices connect to your PC via USB. If you have a PCIe card, install it in your computer’s expansion slot. Double-check that all drivers are up to date and the device is recognized.
For a detailed, step-by-step reference on wiring and device setup, see the Convert VHS to Computer Guide.
Organize cables to avoid tangles or accidental disconnects. This simple step keeps your transfer smooth and safe.
Why Choose the RVT Digitizer for Superior Results?
When you capture vhs to pc, the RVT Digitizer stands apart from generic converters. Its advanced encoding chip preserves every detail, delivering sharper images, truer colors, and crystal-clear sound.
Families and collectors consistently choose RVT Digitizer for its reliability. The plug-and-play setup means no technical skills are required, while the professional-grade build ensures years of flawless transfers. Imagine preserving your 20-year-old wedding video and seeing colors pop and voices ring true, just like the day it was filmed.
Unlike cheaper alternatives, the RVT Digitizer maintains perfect audio sync and smooth playback, even with challenging tapes. Plus, you’re backed by responsive U.S.-based support and a solid warranty. Trust the RVT Digitizer to safeguard your memories for a lifetime.
Ensuring PC Readiness
Your computer must be ready before you capture vhs to pc. Check these essentials:
- At least 4GB RAM and a modern multi-core CPU
- Sufficient free storage (8GB per hour of video recommended)
- Available USB or PCIe ports for the capture device
Adjust power settings to prevent your PC from entering sleep mode during long transfers. This small step can save hours of frustration and ensure uninterrupted video capture.
Installing and Configuring Capture Software
Install the capture software that works with your video capture device. Popular choices include OBS Studio, CyberLink, or software provided with the RVT Digitizer.
Open the app, select the correct input source, and set resolution to match your tape (720x480 for NTSC or 720x576 for PAL). Adjust audio settings for stereo and preview the signal. Before you capture vhs to pc, confirm you see and hear everything clearly in the preview window.
Run a short test capture to check for any sync or quality issues. A few minutes spent here can prevent lost footage later.
Workspace Ergonomics and Safety
Create a safe, organized space for your transfer project. Place your VCR and PC on a stable surface. Route cables neatly and away from walkways to prevent tripping or unplugging during the process.
Ensure your workspace is well ventilated, especially for long capture sessions. Overheating can damage equipment or interrupt transfers. Taking these precautions ensures your journey to capture vhs to pc is smooth, safe, and successful.
Step 2: Capturing VHS Footage to Your PC
Ready to start the most important part of your journey to capture vhs to pc? This step is where your memories come to life in digital form. We’ll walk you through preparing your tape, setting up for the best quality, and making sure each recording is smooth and secure. Let’s make sure every moment gets saved—no detail missed.
Preparing the Tape for Playback
Before you capture vhs to pc, give your tape a quick inspection. Look for physical damage, mold, or dust—these can cause playback issues or even damage your VCR. If you spot any, gently clean the cassette’s exterior with a soft cloth.
Fast-forward and rewind the entire tape once to loosen it up. This helps prevent sticking or uneven playback. Always double-check that the tape is fully rewound to the starting point you want to digitize.
If you’re using the RVT Digitizer, its advanced signal processing helps minimize the impact of minor tape imperfections. Still, starting with a clean, prepped tape delivers the best results every time.
Configuring Capture Settings for Best Quality
Open your capture software and choose the right settings before you capture vhs to pc. For archival quality, set your resolution to 720x480 (NTSC) or 720x576 (PAL). These match the original VHS format and preserve as much detail as possible.
Select a bitrate between 4 and 8 Mbps for MP4 files—this balances quality and file size. Make sure your audio is set to stereo, with a sampling rate of 44.1 or 48kHz for clear sound. Enable deinterlacing if your software offers it, which smooths out jagged lines and improves playback on modern screens.
The RVT Digitizer’s hardware encoding chip ensures stable, frame-accurate transfer, so you can trust the settings you pick to deliver memories in vibrant color and crisp sound.
Recording the Video: Step-by-Step Process
Now you’re ready to capture vhs to pc. Cue your tape to the exact spot you want to start digitizing. In your capture software, click the “Record” or “Start Capture” button before pressing play on the VCR. This ensures you don’t miss those first precious seconds.
Keep an eye on the preview window while the tape plays. Watch for dropped frames, static, or audio issues—these can usually be fixed quickly. When you reach the end of the footage, press stop in the software, then on the VCR.
Save your captured file with a descriptive name—include the event, date, or tape number for easy searching later. With the RVT Digitizer, you’ll notice true-to-life colors and sound, making each recording feel like a time machine.
Monitoring and Troubleshooting During Capture
While you capture vhs to pc, stay alert for common hiccups. Signal loss, static, or audio dropouts can happen for many reasons. Adjust your VCR’s tracking dial to clear up picture issues, or check all cable connections for a secure fit.
If your software freezes or frames are dropping, restart both your VCR and PC. Make sure your system isn’t going to sleep during capture. For more detailed help with stubborn issues, visit Troubleshooting VHS to Digital Transfer for expert tips.
The RVT Digitizer’s robust build and U.S.-based support mean you can solve most problems quickly, keeping your project on track.
Managing Large Files and Storage During Capture
VHS tapes can be long, and high-quality files take up space fast. As you capture vhs to pc, monitor your available storage. A two-hour tape at high quality can use up to 8GB—saving to an external or secondary drive is a smart move.
Create a dedicated folder for each project. Back up files as soon as each tape is done. Losing footage due to a full drive or crash is heartbreaking, but with the RVT Digitizer’s reliable transfer, you minimize the risk of file corruption.
Set up automatic file naming or numbering in your software to keep everything organized from the start.
Tips for Capturing Multiple Tapes Efficiently
Planning to capture vhs to pc for a whole collection? Label every tape and digital file clearly—use names, dates, or event tags. Schedule capture sessions in batches but give your VCR and PC breaks to avoid overheating.
Keep a simple log of what you’ve digitized and what’s left. With the RVT Digitizer’s fast transfer speed and stable performance, you can move through multiple tapes with confidence.
Ready to preserve your entire library? With the right approach, you’ll save time and protect every memory for years to come.
Step 3: Editing and Enhancing Your Digital Video
Once you capture vhs to pc, the real magic begins. Editing and enhancing your digital videos lets you bring faded memories back to life, trim out the dull bits, and share your story in a way that feels fresh. Whether you are a parent preserving home movies or a collector archiving rare footage, these steps will help you polish your project for family, friends, or the world.
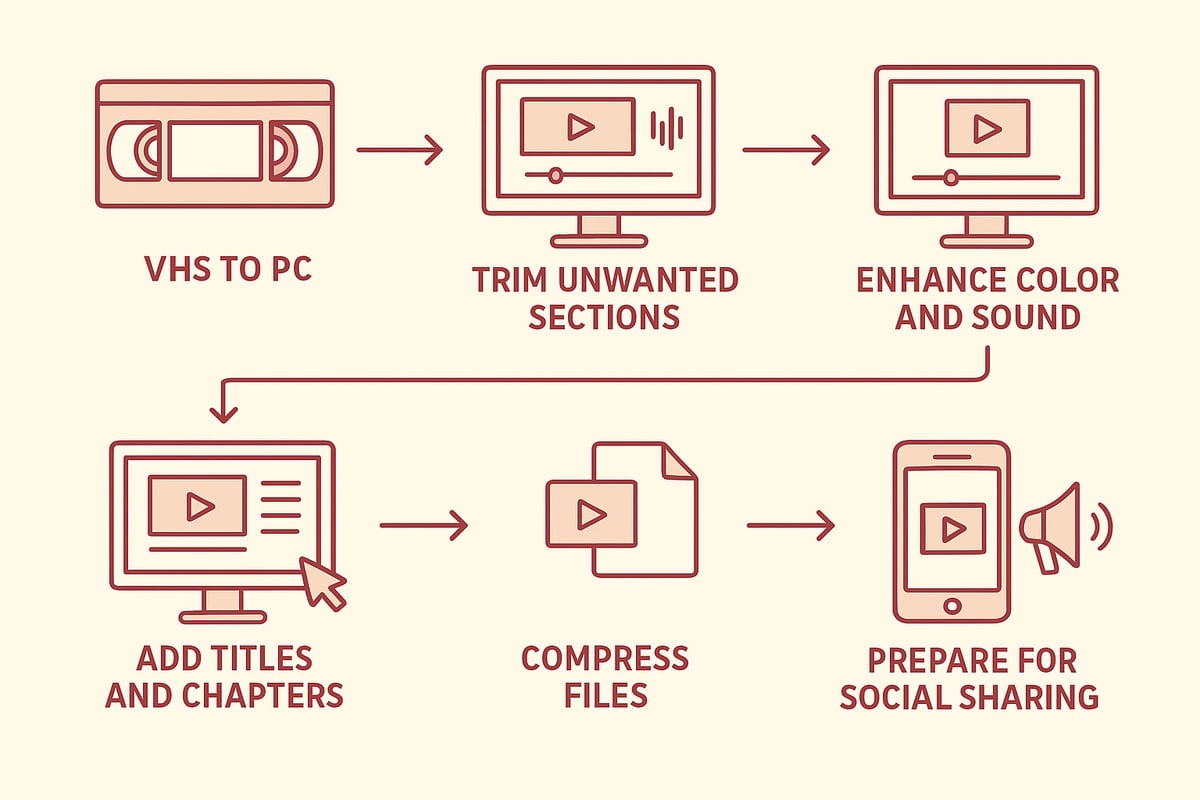
Basic Editing: Trimming and Splitting
After you capture vhs to pc, your first step is basic editing. Most VHS tapes have blank spots, static, or old commercials you will want to remove. Open your new file in a free editor like Shotcut or iMovie. Drag the video to the timeline, then cut out the sections you do not need.
For example, you might trim the start and end of a family birthday party, leaving just the highlights. Splitting long footage into shorter clips also makes sharing easier. Keeping these edits simple means your memories stay authentic and easy to watch.
Enhancing Picture and Sound Quality
The next step after you capture vhs to pc is to boost the quality. VHS tapes often look faded or sound muffled. Use filters in your editing software to adjust brightness, contrast, and color. If you want vibrant, true-to-life results, the RVT Digitizer stands out for preserving color accuracy and sound clarity, thanks to its advanced chip.
Try adding noise reduction to smooth out grainy footage. Sharpening filters can bring out details you thought were lost. For audio, use basic EQ to reduce hiss and pump up voices. A quick before-and-after comparison will show just how much your efforts pay off.
Adding Titles, Chapters, and Metadata
When you capture vhs to pc, you create the perfect chance to organize your memories. Adding titles at the start of each video helps viewers know what event they are watching. Insert simple on-screen text with the date or occasion.
For long recordings, create chapters so family can skip to their favorite part, like the cake-cutting or first dance. Do not forget to embed metadata—details like location or people featured—so you can easily find videos years from now. These small touches make your collection feel personal and polished.
Converting and Compressing Video Files
Once you capture vhs to pc, your raw file may be huge. Converting it to a format like MP4 or MOV balances quality and size. Use your editing software’s export function, choosing settings like 720x480 resolution and 4-8 Mbps bitrate for a good mix of clarity and storage savings.
Batch conversion tools help if you have many tapes. If you plan to archive, save a high-quality version; for sharing, a smaller file works best. Remember, the RVT Digitizer’s pro-grade encoding means your files start out clean and stable, making this step easier.
Creating Backups and Redundant Copies
After you capture vhs to pc and finish editing, do not risk losing your work. Always save a master copy plus an edited version. Use external drives or cloud storage for redundancy. Many families have lost irreplaceable footage to hard drive failures—avoid this by keeping copies in different places.
For more expert tips on safeguarding your digitized collection, check out Preserving VHS Tapes and More. Backing up is the key to making sure your memories last for generations.
Preparing Videos for Social Sharing or Streaming
Ready to share your story? Export your final edit for YouTube, Facebook, or private links. Double-check that your file works on smart TVs and phones. Add captions for accessibility if needed.
Highlight reels are perfect for birthdays or anniversaries. With your videos now digital, sharing is as simple as sending a link. Are you excited to see your family’s past light up on modern screens?
Step 4: Troubleshooting Common Issues
Troubleshooting is key to successfully capture vhs to pc and keep your memories safe. Even with the best gear, hiccups can pop up. Let’s walk through the most common problems and how to fix them, so your transfer stays smooth and your videos look and sound their best.
Video Quality Problems: Lines, Noise, and Color Issues
Ever noticed static lines, fuzzy images, or odd colors when you capture vhs to pc? These are classic signs of tape or hardware trouble. Dirty VCR heads, worn tapes, or low-quality cables are often the culprits.
Quick Fixes:
- Clean VCR heads gently with a cleaning tape.
- Swap out old or cheap RCA cables for shielded, high-quality ones.
- Adjust tracking on your VCR for a sharper picture.
If you see color bleed or rolling lines, check out Signs of VHS tape degradation for more on what to look for and why acting fast matters. Upgrading to a premium device like the RVT Digitizer can resolve most picture issues, thanks to its advanced encoding and reliable signal stability.
Audio Sync and Dropout Fixes
Audio problems can sneak in when you capture vhs to pc, leaving your video out of sync or missing parts of the soundtrack. Common causes include loose cables or software hiccups.
To Fix:
- Double-check all audio connections and reseat cables.
- Use your capture software’s sync tools to realign audio.
- Try alternate inputs if you hear only one channel.
The RVT Digitizer’s hardware encoding keeps sound and picture locked together, minimizing frustration. If audio still drops, try a short test recording to confirm the fix before capturing the full tape.
Software Crashes and Compatibility Errors
Software crashes can interrupt your capture vhs to pc workflow, especially on older computers or with outdated drivers. Error messages might appear, or the program could freeze mid-transfer.
Troubleshooting Steps:
- Update your capture software and device drivers.
- Close unnecessary programs before starting a capture.
- If crashes persist, switch to a different capture app like OBS Studio or check for patches from the manufacturer.
Using a plug-and-play device like the RVT Digitizer typically reduces software headaches, thanks to its strong compatibility and U.S.-based support.
Storage and File Corruption Risks
Running out of space or sudden power loss can corrupt files during the capture vhs to pc process. Protect your efforts with these tips.
Tips:
- Always check available storage before starting a long transfer.
- Use a UPS battery backup for longer sessions.
- Save progress in segments if your software allows.
If a file becomes corrupted, some software offers recovery tools, but prevention is the best cure. Back up files right after capture to stay safe.
VHS Tape Physical Damage Workarounds
Physical tape damage can halt your capture vhs to pc project. Broken splices, wrinkles, or snapped tapes are common with old cassettes.
What to Do:
- For minor issues, use a VHS splicing kit to repair the tape.
- Severe damage? Consider a professional tape transfer service.
- Carefully wind the tape by hand to check for jams before inserting.
Families have saved decades-old footage by tackling small repairs themselves, then switching to the RVT Digitizer for a flawless digital transfer.
Preventing Data Loss During Transfer
Don’t let a crash or mistake erase your memories. Prevent data loss when you capture vhs to pc by following these steps.
- Save your work frequently during editing.
- Keep multiple backups on different devices.
- Always verify files before erasing the original tape or deleting old files.
A little caution now ensures your digital videos last for years, ready for sharing with family and friends.
Step 5: Best Practices for Long-Term Digital Preservation
Preserving your memories does not stop after you capture vhs to pc. True peace of mind comes from knowing your digital videos will last for generations. Families often ask, “How do I keep these files safe for decades?” Let us walk through the best practices that make digital preservation simple, safe, and future-proof.
Choosing the Right Storage Media
After you capture vhs to pc, your storage choice can make or break your preservation efforts. Not all drives are created equal. Some last longer, others offer easier access.
| Storage Type | Lifespan | Pros | Cons |
|---|---|---|---|
| HDD | 3–5 years | Affordable, large capacity | Can fail suddenly |
| SSD | 5–10 years | Fast, reliable | Costlier per GB |
| NAS | 5–10 years | Network access, redundancy | Setup needed |
| Cloud Storage | Variable | Access anywhere | Ongoing fees |
For more on how long these options last, check out physical media longevity insights. Migrate files to new media every five years to avoid surprises.
File Organization and Naming Conventions
A messy folder can turn precious memories into a digital maze. After you capture vhs to pc, set up a clear folder structure. Try organizing by Year, Event, or Person.
- Use descriptive filenames like
1996_July_FamilyReunion.mp4 - Add date and event details for easy searching
- Tag files with metadata for quick sorting
This system saves time when you want to find or share a specific video later.
Creating Redundant and Offsite Backups
One copy is never enough. Even the best hard drive can fail. The 3-2-1 rule is your safety net: keep three copies, on two different media, with one copy offsite.
- Store on an external drive and in the cloud
- Use a NAS for automatic backups
- Rotate backups between home and another location
A family once lost an entire collection to a basement flood, but their cloud backup saved every moment. Always protect what you capture vhs to pc by spreading out your backups.
Regularly Checking and Refreshing Files
Digital files can get corrupted over time. Each year, set a reminder to check your videos. Use tools like checksums or hash verifiers to spot issues early.
Refresh your videos to newer formats as standards change. This keeps your files playable on future devices and avoids compatibility headaches.
Sharing and Accessing Digitized Memories
Once you capture vhs to pc, sharing is easy and fun. Create a family cloud archive, send private links, or upload highlight reels for birthdays and anniversaries.
- Print video stills for photo albums
- Share short clips on social media
- Create themed playlists for special occasions
Your loved ones will thank you for making memories accessible and organized.
Protecting Privacy and Copyright
Not every video is meant for public eyes. Protect your digital collection with passwords or encryption. Understand the difference between personal and commercial use, especially if you digitize purchased tapes.
Be mindful of copyright when you capture vhs to pc. Always get permission before sharing content that is not your own. With these steps, your memories stay safe, private, and ready for the next generation.
You've seen how simple it is to bring your favorite VHS moments into the digital age, step by step. Whether it’s laughter-filled family gatherings or cherished childhood footage, protecting these memories is easier than ever. With the RVT Digitizer, you can capture every detail in stunning clarity—no tech headaches or guesswork. Why risk losing those priceless tapes to time, when you can save them for generations with just a few clicks? Ready to make sure your stories live on and look their best? It’s time to Digitize my tapes today.