
Imagine reliving your childhood birthdays, family holidays, or wedding day on a bright, modern screen. Those moments, once locked away on VHS tapes, can fade with time. The good news? You can easily record vhs to computer and keep those memories safe, clear, and ready to share.
This guide shows you how to use today’s best tools and techniques. You’ll learn why digitizing matters, what gear you need, and the steps to transfer tapes quickly and with top quality. Ready to preserve your story for the next generation?
Why Digitize VHS Tapes in 2026?
Preserving memories means acting before they fade. VHS tapes, once the gold standard for home video, are fragile. Over time, the magnetic tape inside loses its signal, with up to 20% loss every 10–15 years. Humidity, heat, and even mold can destroy footage forever. Many families discover precious wedding or birthday videos are already damaged. According to VHS tape degradation over time, this decay is unavoidable. The best way to save these moments is to record vhs to computer before it's too late.

The Fragility of VHS Media
VHS tapes are not built to last. Every year, the magnetic tape inside becomes weaker. Physical threats like mold, dust, and temperature swings speed up the loss. Imagine finding your child's first steps or a favorite holiday gathering only to see static and faded colors. That is why families and collectors trust the RVT Digitizer. It captures every detail, locking in vibrant color and sound for decades. If you want to record vhs to computer, acting now gives you the best chance to save those irreplaceable moments.
Obsolescence of Playback Equipment
Trying to find a working VCR in 2026 can feel like a treasure hunt. Major brands stopped making them years ago. Spare parts are rare, and repair shops are closing. Prices for used VCRs have tripled in just a few years. Even if you have a player, it might not last through all your tapes. When you choose to record vhs to computer, you bypass the risk of losing access forever. The RVT Digitizer works with nearly any VCR, making the transfer process simple and stress-free.
Preserving Family and Cultural Heritage
Home movies, school plays, and local history often exist only on VHS. These tapes hold memories that connect generations. A family who digitized their holiday recordings was able to share stories with grandchildren who had never seen them before. When you record vhs to computer, you protect not just videos but the legacy and laughter within them. The RVT Digitizer is trusted by families who want professional results and peace of mind.
Accessibility and Sharing in the Digital Age
Once your memories live on your computer, sharing is easy. You can edit, email, or post clips to social media. Cloud storage keeps files safe, even if your computer fails. Did you know 85% of families who digitize their tapes share them with relatives online? Recording vhs to computer means your memories are never stuck on a shelf. The RVT Digitizer's fast transfer speed makes this process quick and easy, so you can focus on reliving and sharing.
Protecting Against Disasters
Fire, flood, or a simple accident can erase VHS tapes in seconds. Digital files, when backed up, survive these threats. Imagine losing every family video in a single day. By choosing to record vhs to computer, you create a safety net for your memories. The RVT Digitizer ensures that what matters most is protected with professional-grade accuracy and reliability.
Increasing Value for Collectors and Creators
Vintage commercials, rare TV shows, and home movies gain value when digitized. Content creators use old footage for documentaries and online videos. A collector who digitized rare tapes was able to share and even monetize unique finds. The RVT Digitizer delivers superior clarity and stability, making it the top choice for those who demand the best results from their record vhs to computer process.
Legal and Archival Considerations
Digitizing VHS tapes helps families and organizations stay compliant with copyright and fair use. Museums and public archives prioritize digital preservation for access and safety. When you record vhs to computer, you make it easier to organize, search, and share content. Choosing the RVT Digitizer means your digital files are ready for long-term storage and future technologies.
Essential Equipment for Recording VHS to Computer
Preserving your memories starts with the right tools. To record vhs to computer with the clarity and reliability you want, each part of your setup matters. Let's break down the essential equipment, so you can avoid frustration and get the best results possible.
VHS Players and Their Importance
The heart of any effort to record vhs to computer is a dependable VHS player. Standard VCRs work for most tapes, but S-VHS models offer better picture clarity, especially for older or worn recordings. Combo units with built-in DVD players can be convenient but sometimes lack manual tracking controls.
Look for a player with S-Video output, adjustable tracking, and head cleaning features. These options help reduce visual noise and signal dropouts. If your tapes are precious family events, investing in a quality VCR can make a huge difference. A well-maintained player is the first step to preserving your footage for years to come.
| VHS Player Type | Key Feature | Best Use Case |
|---|---|---|
| Standard VCR | Composite output | Everyday tapes |
| S-VHS | S-Video, clarity | Important archives |
| Combo VCR/DVD | Convenience | Simple transfers |
Video Capture Devices: Key to Quality
To record vhs to computer, you need a reliable video capture device. Options include USB capture cards, standalone digitizers, and professional interfaces. The difference in quality is striking: high-end capture devices deliver stable video, accurate color, and minimal dropped frames.
Many families and creators struggle with generic converters that introduce lag or artifacts. For a deep dive into device types and what sets them apart, check out the Video to Digital Converter Guide. Choosing the right capture device is crucial for preserving every detail and sound from your original tapes.
Cables and Connections
Connecting your VCR to a capture device requires the right cables to record vhs to computer successfully. RCA (composite) cables are common, but S-Video offers sharper images. SCART adapters may be needed for European equipment. Always use high-quality, gold-plated connectors to minimize signal loss and interference.
Adapters for modern PCs, such as USB 3.0 or Thunderbolt, ensure compatibility and fast data transfer. Secure all connections tightly before you begin, as loose cables can result in dropped frames or audio sync issues.
Computer Requirements
Your computer plays a big role in the record vhs to computer workflow. Make sure you have at least 8GB RAM, a fast SSD for storage, and USB 3.0 ports. These specs help prevent lag during capture and editing.
Keep plenty of free space available, as video files can be large. Backup drives are essential for redundancy. Organizing your workspace and files from the start will save time and stress later.
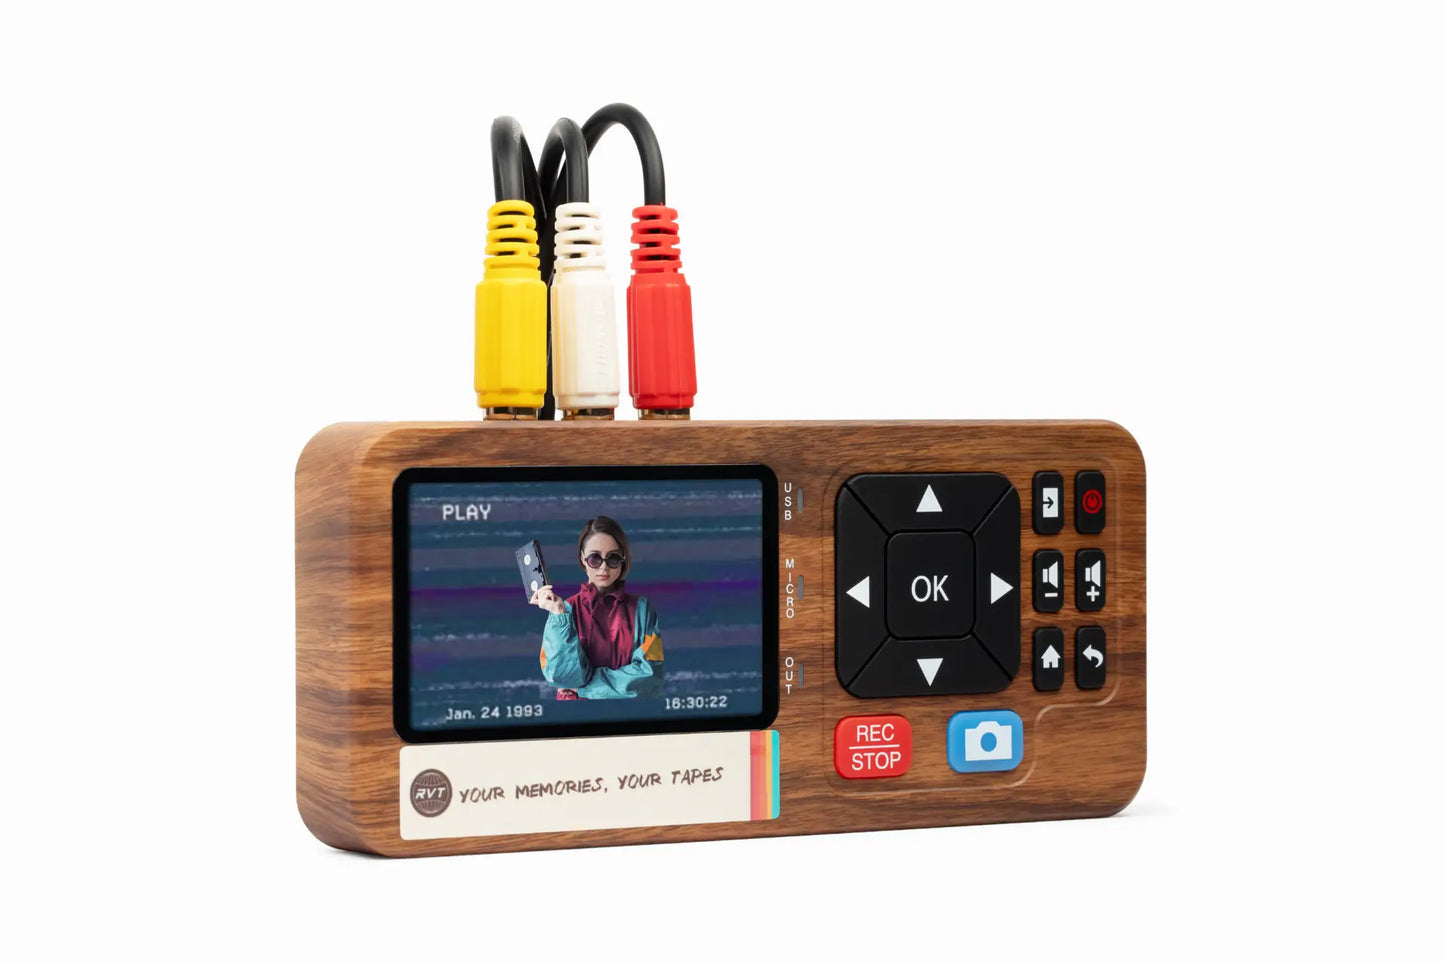
[RVT Digitizer: The Industry Benchmark] (https://retrovisiontech.com)
If you want to record vhs to computer with professional results, the RVT Digitizer stands out as the gold standard. Families, collectors, and creators trust it for its superior picture clarity, vibrant color, and true-to-life sound. Its advanced encoding chip ensures every frame is captured with precision, avoiding the glitches or artifacts common with generic converters.
Setup is simple: plug it in, connect your cables, and start saving memories. No drivers or complex software are needed. The RVT Digitizer supports not only VHS but also Hi8, MiniDV, and camcorder input. With U.S.-based support, a 2-year warranty, and broad compatibility, it's built for lifetime reliability. One family used the RVT Digitizer to archive decades of home movies, amazed by the difference in quality and ease compared to cheaper alternatives.
Software for Capturing and Editing
Once your hardware is ready, choose software to capture and edit your videos. Free options like OBS Studio offer real-time previews and flexible formats. Paid suites may provide extra features such as lossless capture or batch processing.
Look for tools that simplify the record vhs to computer process, with intuitive controls for trimming, adjusting colors, and syncing audio. OBS Studio is a favorite for its stability and wide support. Test your setup with a short clip before digitizing an entire tape.
Cleaning and Maintenance Tools
To keep your equipment running smoothly, invest in cleaning and maintenance tools. VHS head cleaners, demagnetizers, and tape repair kits can extend the life of your player and tapes.
Regular cleaning helps prevent picture dropouts and static lines. If you notice issues during transfer, pause and check your equipment before continuing. Good maintenance is key to a successful digitization project.
Step-by-Step Guide: How to Record VHS to Computer in 2026
Preserving your memories is easier than ever. With the right equipment and a little guidance, you can record vhs to computer and keep your family’s history safe for generations. This section walks you through every step, from setup to digital backup. Want even more detailed instructions? Check out this How to Convert VHS to Computer guide for extra tips.

Step 1: Prepare Your Workspace and Equipment
Start your journey to record vhs to computer by setting up a clean, static-free area. Wipe down your workspace to avoid dust sneaking into your equipment. Inspect each VHS tape for mold or visible damage—old tapes can be fragile.
Check your VCR’s playback by running a test tape. If you notice fuzzy images or static, clean the heads with a VHS cleaning cassette. A well-maintained VCR ensures smoother transfers and better quality.
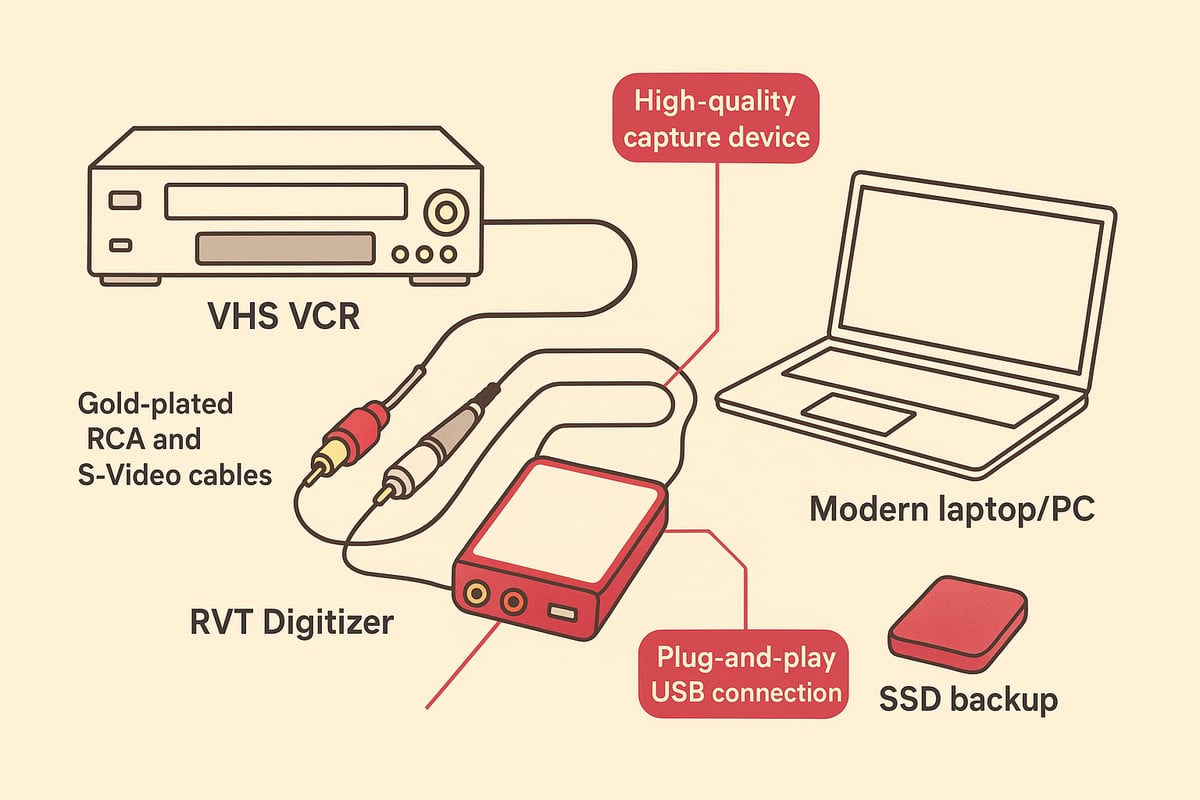
Step 2: Connect Your VHS Player to the Computer
To record vhs to computer, connect your VCR to the capture device. Use high-quality RCA or S-Video cables for the clearest signal. Plug one end into the VCR’s output ports and the other into the RVT Digitizer.
The RVT Digitizer stands out for its plug-and-play simplicity. Unlike generic converters, you won’t need extra drivers or tools. Connect the RVT Digitizer to your computer’s USB 3.0 port. Secure all connections to avoid wobbly signals or interruptions.
Step 3: Install and Configure Capture Software
Next, install the software needed to record vhs to computer. The RVT Digitizer comes with its own app, but you can also use OBS Studio or VLC. Download your preferred software and open it on your computer.
Choose the correct video input (usually labeled as “USB Video” or “Capture Device”). Set your format to high-bitrate MP4 or AVI. Adjust resolution to 480p for true VHS quality. Don’t forget to check audio settings for stereo sound and proper sync.
Step 4: Insert and Cue Up the VHS Tape
Now you’re ready to record vhs to computer. Insert your VHS tape into the player and rewind it fully. Play a few seconds to check for any issues—use tracking controls to clear up static or lines.
Pause the tape right where you want the recording to begin. This step helps you capture only the moments you want, saving time and storage. The RVT Digitizer’s advanced chip ensures every frame is preserved, even from worn tapes.
Step 5: Start Recording and Monitor the Process
Begin the process to record vhs to computer by clicking “Start Capture” in your software. Quickly press play on the VCR. Watch the live preview for dropped frames or audio sync issues.
If you’re transferring a long tape, record in segments. This makes it easier to edit and organize later. With the RVT Digitizer’s stability and color accuracy, you can trust each segment will look and sound as good as possible.
Step 6: Save and Review the Digital File
When the recording is complete, stop the capture and save your file. To record vhs to computer successfully, always check the digital file right away. Play it back to confirm video clarity and audio sync.
Trim any unwanted sections or blank space using the editing tools in your software. Label the file clearly, such as “1992_Graduation_SmithFamily.mp4” for easy retrieval. The RVT Digitizer’s precision helps reduce editing headaches.
Step 7: Backup and Organize Your Files
After you record vhs to computer, protect your memories with smart backups. Copy each file to an external hard drive, cloud storage, or a NAS device. Create folders by year, event, or person for fast searching.
For extra safety, keep multiple copies in different locations. This step guards against loss from device failure or accidents. The RVT Digitizer’s reliable output lets you archive with confidence.
Troubleshooting Common Issues
Encountering problems as you record vhs to computer? Here’s how to solve the most common ones:
- No signal on screen: Recheck cables and input sources.
- Static or noise: Clean VCR heads, adjust tracking, or switch to S-Video.
- Audio out of sync: Try a different USB port or adjust software settings.
- Dropped frames: Use the RVT Digitizer for best signal stability.
Many families have switched to the RVT Digitizer after generic devices failed to deliver, noting a big jump in clarity and reliability.
Tips for Efficient Workflow
Want to save time as you record vhs to computer? Batch process your tapes. Set aside a weekend and digitize several tapes in one session.
Keep a log of what you’ve transferred and where each file is stored. Take regular breaks to let your equipment cool down. The RVT Digitizer’s fast transfer speed helps speed up the process, making it easier to preserve your memories without stress.
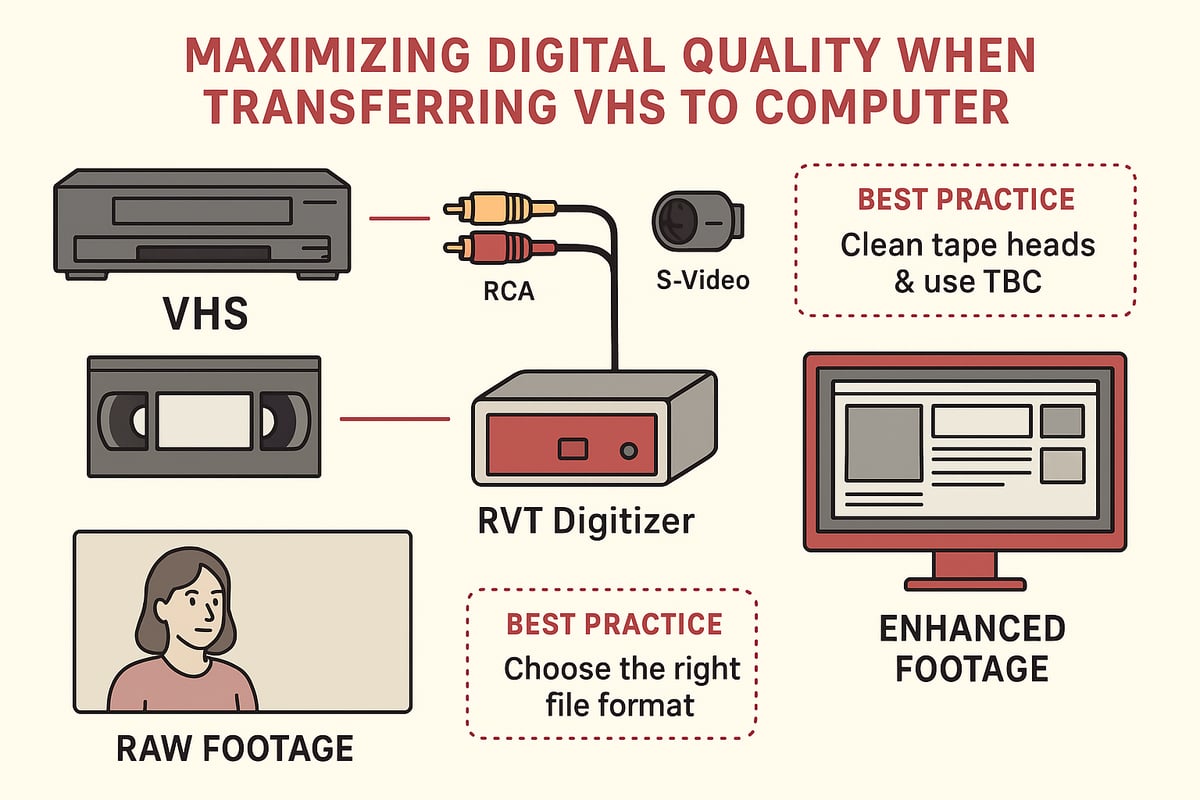
Maximizing Digital Quality: Best Practices and Pro Tips
Preserving your precious memories means more than just transferring old tapes. To truly maximize the results when you record vhs to computer, it's important to use the right settings, equipment, and techniques at every stage. Let’s break down the steps to ensure your digital files are crisp, vibrant, and ready for a lifetime of viewing.
Choosing Optimal Settings for Capture
Start with the right capture settings to preserve as much detail as possible. For VHS, set your resolution to 480p, which matches the tape’s native quality. Select a higher bitrate to prevent blocky artifacts. Always capture audio in stereo at 44.1 kHz or higher for clear sound.
If you record vhs to computer using the RVT Digitizer, you’ll benefit from its advanced encoding chip that locks in accurate colors and crisp images. This device makes it easy to get pro-level results, even for beginners. Think of it as setting your memories to “high definition” for years to come.
Enhancing Video and Audio During Transfer
Signal quality can make or break your transfer. Use a time base corrector (TBC) to stabilize the video, especially if tapes are worn. Noise reduction filters help clean up static and visual fuzz. The RVT Digitizer stands out here, with built-in features that outperform generic capture cards.
For more hands-on advice, check out this Capture VHS to PC Tutorial, which covers troubleshooting and optimizing your workflow. Even small adjustments can make a big difference when you record vhs to computer for family archives.
Editing and Restoration Techniques
Once your footage is digital, simple edits go a long way. Trim out blank spots, correct colors, and use deinterlacing to smooth motion. For tougher projects, try frame-by-frame repair or AI-powered upscaling tools. These can restore lost detail and breathe new life into faded scenes.
Families often find that using the RVT Digitizer gives them a head start, since the initial capture is cleaner. Creators also use advanced editing to prepare content for documentaries or YouTube. Want to see the difference? Compare a raw transfer to a restored clip and watch the memories shine.
File Formats and Long-Term Preservation
Choosing the right file format is crucial for future-proofing. MP4 with H.264 encoding is widely supported and perfect for sharing. For archiving, consider AVI, which is less compressed. Avoid obscure formats that might become obsolete.
For more tips on preserving your digital treasures, visit Copying VHS Tapes to Digital. When you record vhs to computer, always keep multiple copies on different drives or cloud backups. This way, your memories stay safe, even if tech changes.
Labeling and Metadata
Don’t let your digital files become a mystery. Add clear labels, dates, and short descriptions to each video. Use standardized file naming, like 1998_Graduation_SmithFamily.mp4, for easy sorting.
Metadata tags help you search by event or person. This step saves time when you want to relive special moments or share clips with relatives. Organization matters as much as the transfer itself.
Ensuring Future Compatibility
Technology keeps moving, but your memories shouldn’t get left behind. Store files in open, well-supported formats and plan to move them to new storage as needed. When you record vhs to computer with the RVT Digitizer, you’re already ahead, since its files work smoothly on Windows and Mac devices.
Teach family members how to access and enjoy these archives. Future generations will thank you for keeping the stories alive and accessible. Are you ready to hand down your legacy?
Sharing and Accessibility
Now comes the best part: sharing your digital memories. Create highlight reels for birthdays or holidays. Upload videos to private YouTube channels or family cloud drives for easy viewing.
With digital files, you can send a copy across the world in seconds or play a slideshow at a reunion. When you record vhs to computer, you’re not just saving the past—you’re making it easy to celebrate with loved ones anytime.
Organizing, Storing, and Sharing Your Digital Memories
Preserving your memories after you record vhs to computer is only the first step. Organizing, storing, and sharing those digital files ensures your family stories stay safe, accessible, and ready to relive for years to come.
Digital Organization Strategies
After you record vhs to computer, start by creating a clear folder structure. Organize by year, event, or family member. For example:
- 1996_BirthdayParty_SmithFamily
- 2002_Graduation_Jane
- 2010_Holiday_Reunion
Add tags and metadata to each file. Details like date, location, and names make searching and sorting effortless. This structure keeps your digital library tidy and makes finding special moments a breeze.
Secure Storage Solutions
Your digital memories deserve strong protection. Always keep multiple copies of files after you record vhs to computer. Use a combination of external hard drives, SSDs, and cloud storage. Consider a NAS device for larger collections or family access.
Table: Storage Options
| Option | Pros | Cons |
|---|---|---|
| External Hard Drive | Portable, affordable | Can fail, needs backup |
| SSD | Fast, durable | Higher cost |
| Cloud Storage | Off-site, accessible | Ongoing fees |
Redundancy is key, especially since videotape preservation challenges show how fragile physical media can be. Back up files in at least two locations for peace of mind.
Sharing with Family and Friends
Once you record vhs to computer, sharing is simple. Upload videos to cloud drives or create private streaming links for relatives. Some families make custom DVDs for grandparents who prefer physical media.
Mini story: The Johnsons digitized their family tapes using the RVT Digitizer, then shared holiday videos through a private YouTube channel. Relatives across the country watched together, sparking laughter and memories.
Privacy and Security Considerations
Protect your digital memories with smart security steps. Use password protection for sensitive files, especially when sharing online. Encrypt backup drives if you store personal footage.
- Set strong, unique passwords
- Enable two-factor authentication on cloud accounts
- Review sharing settings regularly
These steps help you confidently record vhs to computer and keep family moments private yet accessible.
Creating Digital Photo Albums and Montages
Transform your videos into engaging albums or montages. Many tools let you combine video clips, still images, and background music for special occasions. For instance, a memorial video can bring together decades of footage, all preserved with the RVT Digitizer’s superior clarity.
Tip: Save project files in organized folders so you can easily update or revisit them later.
Accessibility for Future Generations
Future-proofing is vital. Store your files in widely supported formats like MP4, ensuring they remain playable as technology changes. Teach family members how to access and enjoy your digital archive.
After you record vhs to computer, consider creating a simple guide for relatives. This helps everyone stay connected to your shared history.
Keeping Memories Alive
Digitizing your tapes is just the beginning. Schedule regular family viewings or create highlight reels for reunions. These traditions help stories live on.
As the VHS format history and decline reminds us, old formats fade, but digital memories can last. With the RVT Digitizer, you ensure every moment is preserved in top quality for future generations to cherish.
You’ve seen how easy it is to bring your old VHS memories into the digital age—no more worrying about tapes fading or VCRs breaking down. Imagine sharing those birthday parties or game nights with your kids or friends, all in perfect clarity. With today’s tools, you can protect every laugh, every milestone, and every story for years to come. Why let those moments gather dust another day? If you’re ready to keep your family history safe and simple to enjoy, why not Digitize my tapes today?