
Best VHS Converter for Old Family Videos
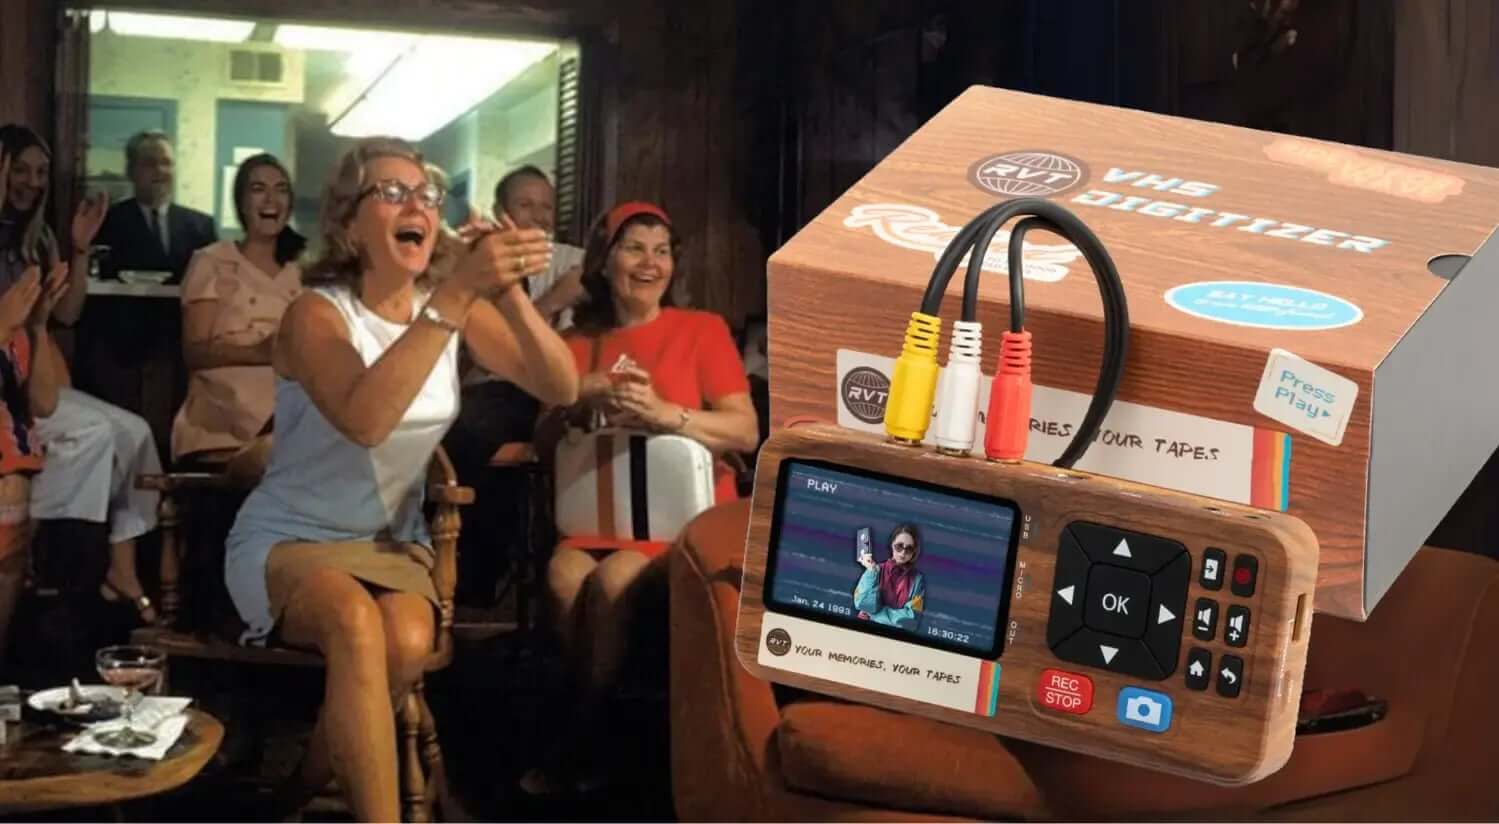
Your family's most precious moments deserve more than boxes gathering dust in the basement. The best VHS converter for old family videos transforms those irreplaceable memories into crystal-clear digital files you can watch, share, and preserve forever—without the hassle of expensive services or complicated software. Whether it's your children's first steps, your parents' wedding, or decades of holiday gatherings, the RVT Digitizer 3.0 makes preservation effortless. Connect your VCR, press record, and watch the magic unfold on your modern devices.

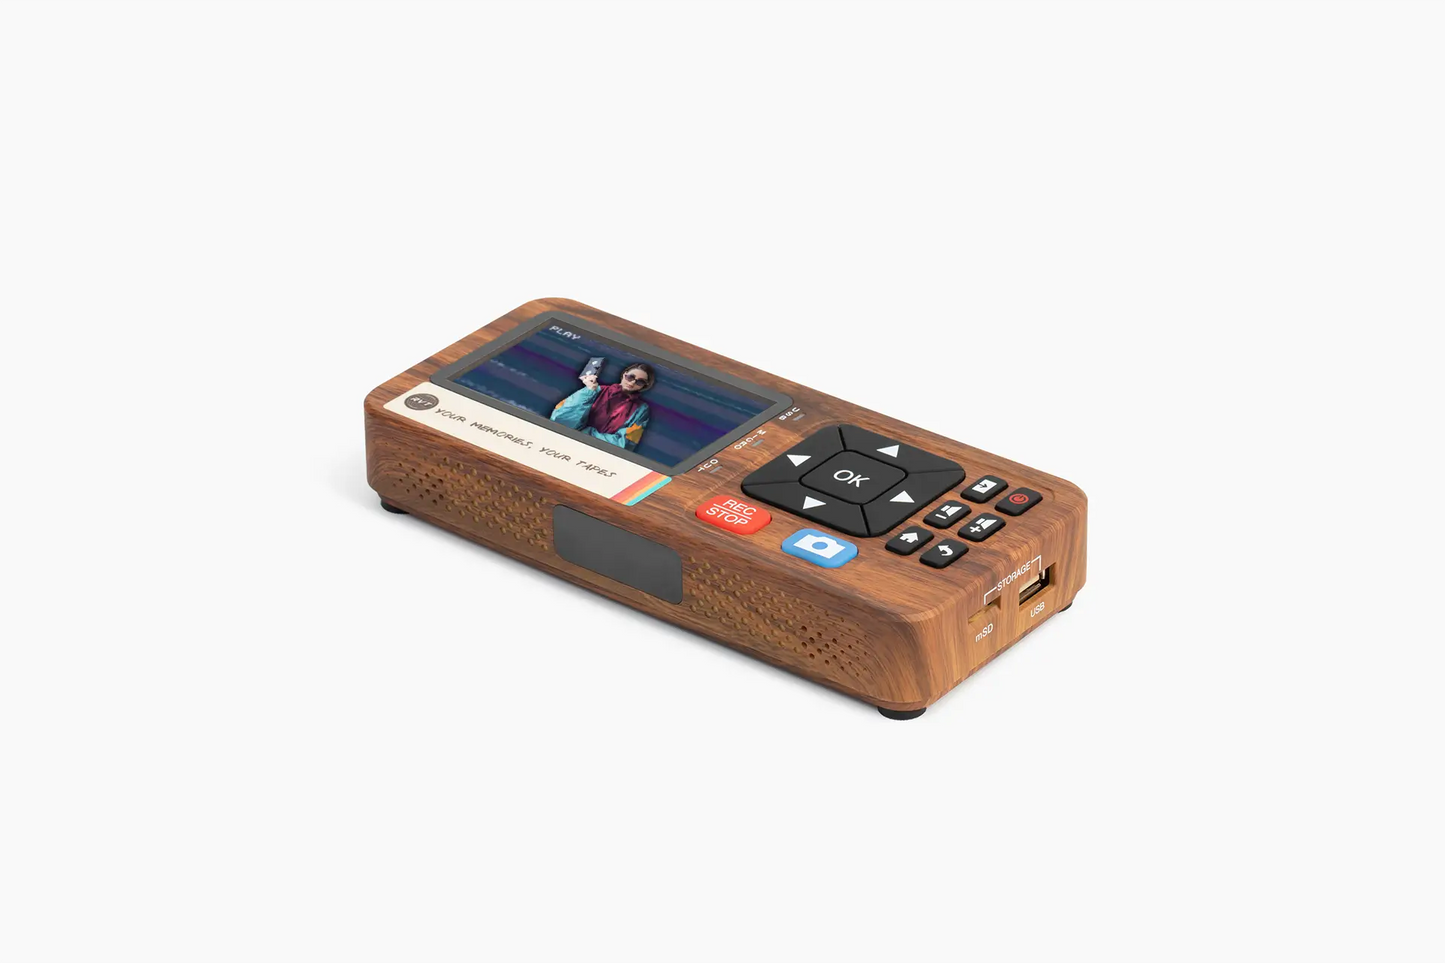
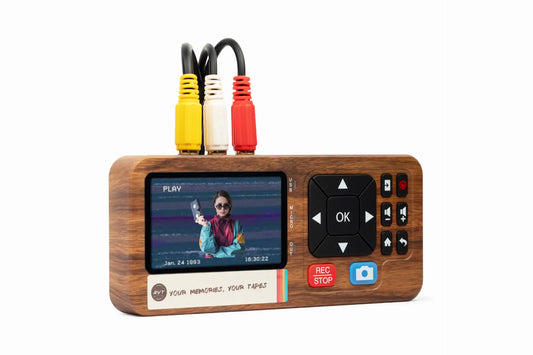
RVT Digitizer 3.0
The RVT Digitizer is a plug-and-play VHS-to-digital converter built for people who want to preserve old memories without the hassle.
View full details
Why Families Trust the RVT Digitizer 3.0 for VHS Conversion
When it comes to preserving family history, you need more than just a converter—you need reliability, ease, and professional-grade quality without the professional price tag. The RVT Digitizer 3.0 stands apart because it was designed specifically for people who don't have time for technical complications but refuse to compromise on the memories that matter most.
Unlike USB-powered devices that fail mid-conversion (losing hours of work), our wall-powered adapter ensures stable, uninterrupted transfers every single time. The built-in 3.5" LCD screen lets you monitor your conversion in real-time, so you can catch any playback issues before they become permanent problems. And with direct iPhone and Android compatibility, your freshly digitized videos can be in your hands—and shared with family across the country—within minutes of finishing.
Most families discover boxes of VHS tapes after a move, an estate clearing, or simply while cleaning out storage. The urgency hits when you realize these tapes degrade with every passing year. Magnetic tape deteriorates, colors fade, and eventually, the memories vanish. Professional conversion services charge $15-30 per tape, which adds up fast when you're looking at 20, 40, or 100+ tapes. The RVT Digitizer 3.0 pays for itself after converting just 6-12 tapes—and you maintain complete control over your private family moments.
This isn't about nostalgia for nostalgia's sake. This is about reclaiming your family's visual legacy and ensuring future generations can witness the moments that shaped who you are. Grandchildren deserve to see their grandparents young and vibrant. Adult children deserve to revisit the love and chaos of their childhood. And you deserve the peace of mind that comes from knowing these memories are safe, accessible, and permanent.
The Complete Guide to Converting Family VHS Tapes
What Makes a VHS Converter "Best" for Family Videos?
Not all VHS converters are created equal—especially when you're dealing with irreplaceable family footage. The best VHS converter for old family videos must balance three critical factors: ease of use, conversion quality, and reliability.
Ease of use means your 70-year-old parent can operate it without calling tech support. It means clear instructions, intuitive buttons, and plug-and-play functionality. The RVT Digitizer 3.0 requires no computer, no software installation, and no driver downloads. You plug in your VCR, insert a USB drive, and press record. That's it.
Conversion quality determines whether your digitized memories look washed out and pixelated or vibrant and clear. VHS tapes max out at 480i resolution, but poor converters introduce additional compression artifacts and color distortion. The RVT Digitizer 3.0 captures at Full HD 1080P, preserving every bit of detail your original tape contains. Colors remain true to the source, and the MP4 format ensures compatibility across all modern devices.
Reliability is non-negotiable when you're working with one-of-a-kind footage. A converter that crashes mid-tape or requires constant troubleshooting isn't worth the frustration. Wall power (rather than USB power) eliminates voltage fluctuations that cause dropouts. The included remote control lets you pause, stop, or rewind without hovering over the device. And with a 2-year warranty backed by Texas-based customer support, you're never left stranded with technical issues.
How to Convert VHS Tapes to Digital: Step-by-Step
Converting your family's VHS collection doesn't require technical expertise—just patience and the right equipment. Here's exactly how to digitize your tapes using the RVT Digitizer 3.0:
Step 1: Gather Your Equipment
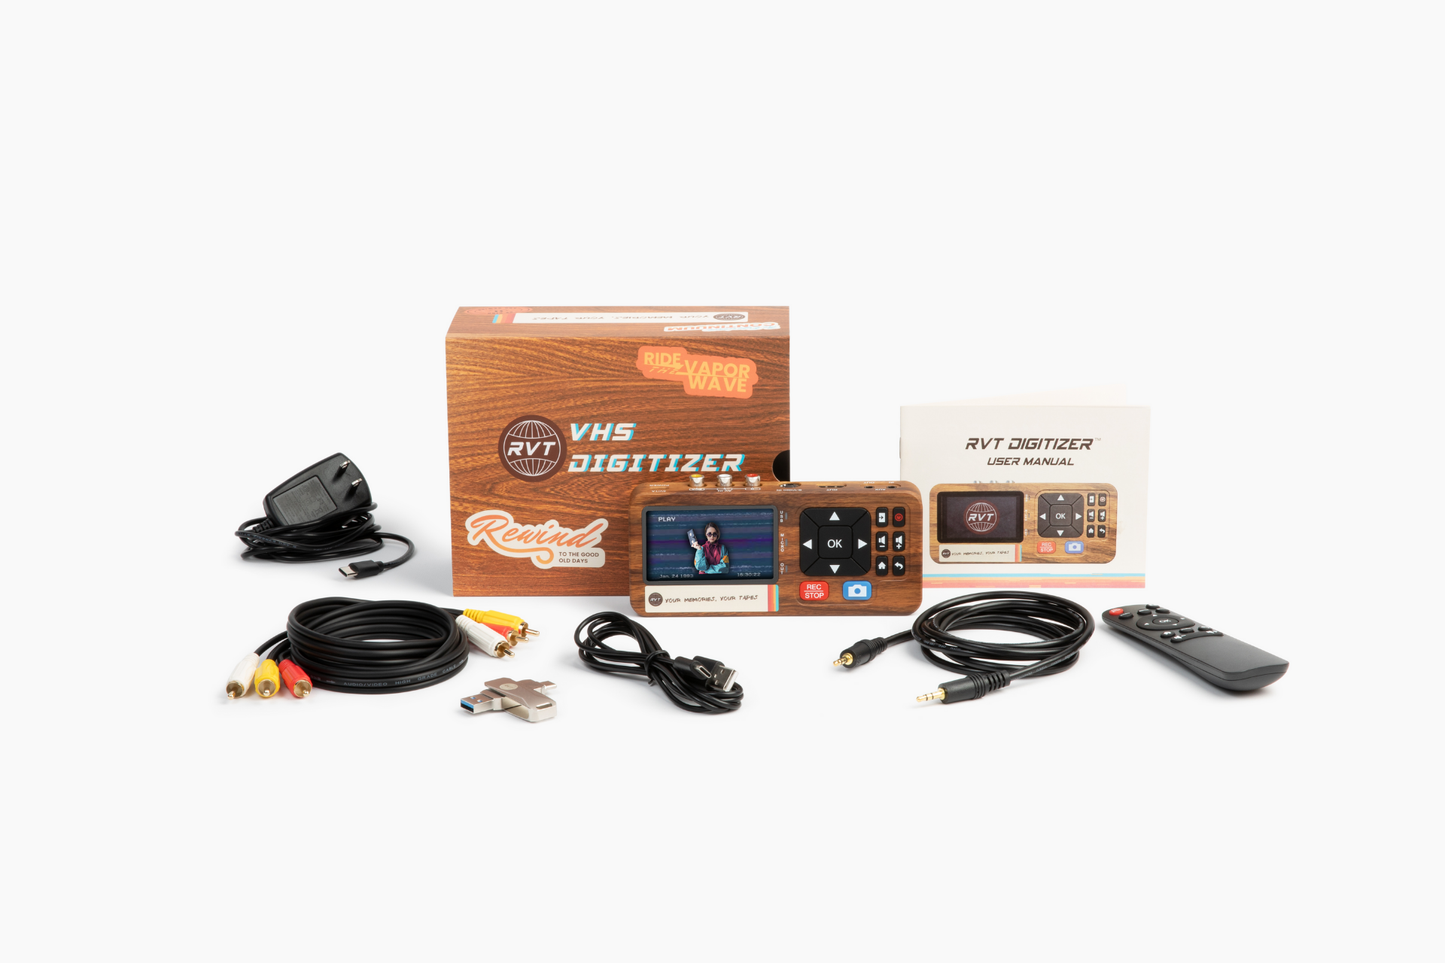
You'll need your VHS player (VCR), the RVT Digitizer 3.0, the included RCA cables, a formatted USB drive (32GB included), and the power adapter. Make sure your VCR is in working condition—the digitizer captures video from a functioning player, it doesn't play tapes itself.
Step 2: Connect Everything
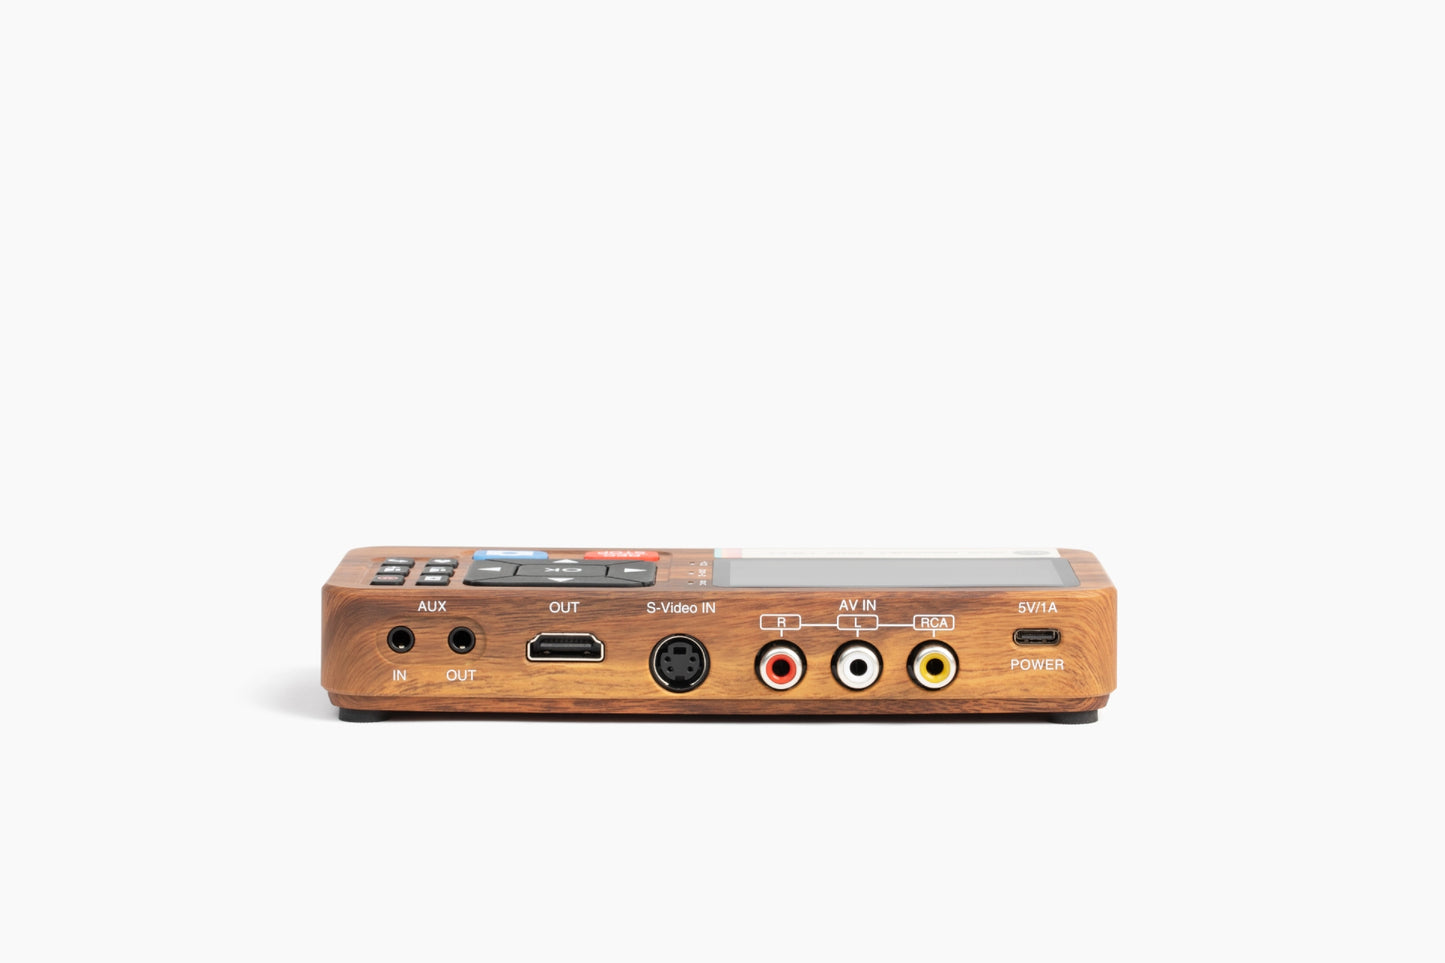
Plug the RCA cable (red, white, yellow) from your VCR's "Out" ports to the RVT Digitizer's "In" ports. Match colors to colors. Connect the power adapter to a wall outlet. Insert your USB drive into the digitizer's USB port. Power on both devices.
Step 3: Set Up Your Tape
Insert your VHS tape into the VCR and rewind to the beginning (or wherever you want to start recording). Press play on your VCR—you should see the video appear on the digitizer's built-in screen. If you see "No Signal," your VCR might not be playing yet, or the cables aren't fully connected.
Step 4: Start Recording
Once you see a clear picture on the LCD screen, press the "Record" button on the RVT Digitizer 3.0 (or use the remote control). The device will begin capturing video in real-time. A 2-hour tape takes 2 hours to convert—this ensures maximum quality with no shortcuts.
Step 5: Monitor and Complete
Watch the screen periodically to ensure the conversion is progressing smoothly. When your tape ends (or you've captured what you need), press "Stop." The digitizer will finalize the file and save it as an MP4 to your USB drive. Eject the USB drive and plug it into your computer, smart TV, or phone to view, edit, or share.
Pro Tip: Clean your VCR's tape heads before starting. Dirty heads cause tracking lines and poor image quality. Use a VHS head cleaning tape or isopropyl alcohol on a cotton swab.
VHS vs. Professional Conversion Services: What's Worth It?
Many families consider sending their tapes to professional digitization services—companies like Costco Photo Center, Legacybox, or local video transfer shops. While these services deliver quality results, they come with significant drawbacks that make DIY conversion the smarter choice for most households.
Cost Comparison: Professional services typically charge $15-30 per tape, with some charging extra for longer tapes or rush processing. Converting 30 tapes professionally costs $450-900. The RVT Digitizer 3.0, at $179, pays for itself after 6-12 tapes and can handle unlimited conversions over its lifetime.
Privacy and Control: Shipping your family's private moments to strangers introduces risk. Tapes can be lost in transit, damaged during handling, or—worst case—viewed by employees. With the RVT Digitizer 3.0, your memories never leave your home. You control the entire process from start to finish.
Turnaround Time: Professional services often take 4-8 weeks (or longer during busy seasons). If you discover a tape is damaged or needs special attention, you're waiting even longer. Converting tapes yourself means you can start today and work at your own pace, prioritizing the most important videos first.
Flexibility: With your own converter, you decide which parts of the tape to keep, where to start and stop, and how to organize your files. You can add voiceover narration, pause mid-tape to switch USB drives, or re-record sections that didn't turn out well. Professional services offer limited customization.
When Professional Services Make Sense: If you only have 2-3 tapes, don't own a VCR, and aren't interested in keeping digitization equipment long-term, outsourcing might be practical. But for most families with 10+ tapes, the investment in a quality converter delivers better value, more control, and faster results.
Can Old VHS Tapes Be Restored or Enhanced?
One of the most common questions families ask is whether their deteriorating VHS tapes can be saved. The honest answer: it depends on the damage, but the sooner you act, the better your chances.
Common VHS Degradation Issues:
- Magnetic decay: Tapes lose signal strength over time, causing washed-out colors and reduced contrast. This process accelerates in hot, humid, or poorly stored conditions.
- Mold and mildew: Moisture exposure creates visible spotting and can permanently damage the tape's magnetic coating.
- Tape stretching: Physical stress from rewinding/fast-forwarding causes warping, leading to tracking issues and distorted audio.
- Sticky shed syndrome: The binder holding magnetic particles breaks down, leaving residue on VCR heads and causing playback failure.
What the RVT Digitizer 3.0 Can Do: While the digitizer can't reverse physical damage to the tape itself, it captures the best possible version of whatever remains. The Full HD 1080P output ensures you're not introducing additional quality loss during conversion. Once digitized, you can use video editing software (like Adobe Premiere, DaVinci Resolve, or even free options like iMovie) to enhance brightness, contrast, and color correction.
When to Seek Professional Restoration: If your tape is severely moldy, physically broken, or won't play at all, consider consulting a professional video restoration specialist before attempting conversion. They can clean, repair, and bake tapes (yes, baking temporarily reverses sticky shed syndrome) to make them playable again. Once restored, you can use the RVT Digitizer 3.0 to preserve the results.
Prevention for Remaining Tapes: Store unconverted tapes in a cool, dry environment (ideally 65-70°F with 30-40% humidity). Keep them upright in their cases, away from magnetic fields (speakers, motors, etc.). Rewind tapes fully before storage to reduce tension on the tape itself. And most importantly: digitize them now. Every year you wait increases the risk of irreversible damage.
Choosing the Right Storage Format for Your Converted Videos
Once you've converted your VHS tapes, the next question is where to store them long-term. The RVT Digitizer 3.0 saves files as MP4s to USB drives or SD cards—but your storage strategy should go beyond the initial capture device.
Immediate Storage: USB Drives
The included 32GB USB drive holds approximately 8-10 hours of footage at standard VHS quality. USB drives are portable, affordable, and work across all devices. However, they're not foolproof—drives can fail, get lost, or become corrupted. Think of your USB drive as a temporary workspace, not your permanent archive.
Local Backup: External Hard Drives
After converting your tapes, copy the MP4 files to an external hard drive (1TB or larger). External drives offer massive storage capacity, fast transfer speeds, and the ability to organize files into folders by year, person, or event. Keep the drive in a safe location separate from your computer. Consider using two drives and storing one off-site (at a family member's house) for maximum protection.
Cloud Storage: The Ultimate Backup
Services like Google Drive, iCloud, Dropbox, or OneDrive provide automatic backup, accessibility from anywhere, and protection against physical disasters (fire, flood, theft). The downside: video files are large, so you'll likely need a paid plan. A 2TB Google One subscription ($9.99/month) can store 500+ hours of digitized VHS footage and can be shared with family members for collaborative access.
Best Practice: The 3-2-1 Rule
Professional archivists recommend keeping three copies of important files: two on different local devices (e.g., USB drive + external hard drive) and one in the cloud. This strategy ensures your family videos survive hardware failure, accidental deletion, or catastrophic events.
File Organization Tips: Create a consistent naming system before you start converting. Use formats like "YYYY-MM-DD_Event_Name.mp4" (e.g., "1994-12-25_Christmas_Morning.mp4"). This makes searching and sharing effortless years down the road. Add metadata tags if your operating system supports it—keywords like "birthday," "vacation," or family members' names make finding specific moments much faster.
Common VHS Conversion Problems and How to Fix Them
Even with the best equipment, occasional hiccups happen during conversion. Here are the most common issues families encounter—and how to troubleshoot them with the RVT Digitizer 3.0.
Problem: "No Signal" Error
Cause: The digitizer isn't receiving video input from your VCR.
Solutions: Confirm your VCR is powered on and actively playing a tape. Check that RCA cables are firmly connected to the "Out" ports on your VCR and the "In" ports on the digitizer. Match colors precisely (yellow = video, red/white = audio). If using S-Video for higher quality, ensure the S-Video cable is connected instead of the yellow RCA cable. Try a different tape to rule out a blank section or damaged tape.
Problem: Black and White Video (No Color)
Cause: Incorrect connection type or VCR settings.
Solutions: If your VCR supports S-Video output, use the S-Video cable instead of the yellow RCA cable for superior color reproduction. Check your VCR's settings menu for color/PAL/NTSC options and ensure it matches your tape format (NTSC is standard in the US). Some VCRs have a "color" button on the remote—make sure it's activated.
Problem: Tracking Lines or Distorted Picture
Cause: Dirty VCR heads or deteriorating tape.
Solutions: Clean your VCR's video heads using a head cleaning tape or manually with isopropyl alcohol and cotton swabs. Adjust your VCR's tracking control (usually a dial or button on the front panel) while the tape is playing. Try fast-forwarding and rewinding the tape a few times to loosen tension and redistribute the magnetic coating. If the problem persists on multiple tapes, your VCR may need professional servicing.
Problem: Audio Out of Sync
Cause: Worn VCR belts or tape damage.
Solutions: This issue typically originates from the VCR, not the digitizer. Try playing the tape in a different VCR if available. You can correct minor sync issues post-conversion using free video editing software like DaVinci Resolve or Shotcut. If the problem is severe, the VCR's internal belts may need replacement—a common $50-100 repair at electronics shops.
Problem: Conversion Stops Mid-Tape
Cause: USB drive full, power interruption, or digitizer overheating.
Solutions: Check available space on your USB drive before starting long conversions. Ensure the power adapter is plugged directly into a wall outlet (not a power strip that might shut off). Allow the digitizer to cool down between multi-hour conversion sessions. Use the "auto-stop" timer feature to split long tapes into manageable segments.
Problem: File Won't Play on Computer/Phone
Cause: Codec compatibility or corrupted file.
Solutions: The RVT Digitizer 3.0 saves files as MP4 with H.264 encoding—universally compatible with modern devices. If a file won't play, try a different media player (VLC is free and plays virtually everything). Re-insert the USB drive and check if the file size matches the expected length (a 2-hour tape should be 4-8GB depending on quality settings). If the file is 0KB or much smaller than expected, the conversion was interrupted—restart the process.
What Types of Tapes Work with the RVT Digitizer 3.0?
Families often have a mix of video formats spanning decades of technology. The RVT Digitizer 3.0's versatility makes it the ideal choice for households with diverse tape collections.
VHS (Video Home System): The most common format, used from the late 1970s through the early 2000s. Standard VHS cassettes come in full-size and compact (VHS-C) versions. The digitizer works perfectly with any VCR that plays VHS tapes.
Hi8 and Video8: These 8mm formats were popular in camcorders from the 1980s-1990s. They produce higher quality than VHS but require a Hi8 or Video8 camcorder with RCA output for playback during conversion.
MiniDV: While MiniDV uses digital recording, older camcorders output analog signals through RCA or S-Video jacks. If your MiniDV camcorder has these outputs, the RVT Digitizer 3.0 can capture the playback. Note: Pure digital transfer via FireWire isn't supported, but the analog output method ensures compatibility.
Betamax: Sony's competitor to VHS, less common but still found in many family collections. If you have a working Betamax player with RCA outputs, the digitizer handles conversion identically to VHS.
Camcorder Formats: Any camcorder (Sony Handycam, Canon, JVC, etc.) with RCA or S-Video output jacks can connect directly to the RVT Digitizer 3.0. This includes older full-size VHS camcorders, compact VHS-C models, and various 8mm variants.
What Doesn't Work: The digitizer requires analog RCA or S-Video input. Modern digital camcorders that only output via HDMI or USB aren't compatible with this model. However, for analog-era family videos (which is 95% of what families are trying to preserve), the RVT Digitizer 3.0 handles everything beautifully.
iPhone and Android Compatibility: Accessing Your Videos Instantly
One of the RVT Digitizer 3.0's standout features is its seamless integration with modern smartphones—something most competing converters overlook entirely.
For iPhone Users (iPhone 15+): The included USB-C adapter lets you connect the USB drive directly to your iPhone 15, 16, or any model with a USB-C port. Using the Files app, you can view, copy, and share your MP4 videos immediately. Upload to iCloud Photos for automatic sync across all your Apple devices, or AirDrop to family members on the spot.
For Android Users: Most modern Android phones support USB OTG (On-The-Go), allowing you to plug in the USB drive via the included USB-C adapter. Videos appear in your file manager and can be copied to internal storage, uploaded to Google Photos, or shared via messaging apps instantly.
Why This Matters: Imagine converting your parents' 50th anniversary video and being able to text it to your siblings before the tape finishes rewinding. Or digitizing your child's first birthday party tape and posting it to a private Facebook album while the footage is still fresh. Instant smartphone access transforms the digitization process from a technical project into an emotional, shareable experience.
Cloud Integration: Once your videos are on your phone, enabling automatic cloud backup means they're permanently protected. Google Photos and iCloud Photos both offer generous free storage tiers, with paid plans providing unlimited archiving for your entire family video library.
How Many VHS Tapes Can You Convert?
The RVT Digitizer 3.0 has no hard limit on the number of tapes you can convert—it's built for marathon digitization sessions. However, practical considerations affect how quickly you can work through your collection.
Time Investment: VHS conversion happens in real-time. A 2-hour tape requires 2 hours to digitize. If you have 50 tapes averaging 90 minutes each, you're looking at 75 hours of conversion time. The good news: you don't need to actively monitor the process. Set up the conversion, let it run while you're cooking dinner or working from home, and check back when it's done.
Storage Capacity: The included 32GB USB drive holds 8-10 hours of standard VHS footage. For larger projects, upgrade to a 128GB drive ($20-30) for 40+ hours of capacity, or invest in a 256GB drive for even more. Alternatively, transfer files to your computer after each tape and reuse the same USB drive indefinitely.
VCR Maintenance: Prolonged use heats up VCRs and can cause belt slippage or head wear. Clean your VCR heads every 10-15 hours of playback using a head cleaning tape. Allow your VCR to cool for 30 minutes after every 4-5 hours of continuous operation. This extends its life and maintains conversion quality throughout your project.
Realistic Timeline: Most families convert 2-4 tapes per week, finishing a 30-tape collection in 2-3 months. If you're motivated (or facing a deadline like an upcoming family reunion), dedicating weekends to the project can accelerate progress significantly. The key is starting sooner rather than later—tape degradation doesn't pause while you procrastinate.
Sharing Digitized Family Videos: Best Practices
Converting your tapes is just the beginning. The real magic happens when you share these memories with family members who've been longing to relive them.
Private YouTube Uploads: Create a private or unlisted YouTube channel dedicated to family videos. Upload your MP4 files and share the link with family members. YouTube handles all the technical details (streaming, format conversion, device compatibility), and family can watch from anywhere without downloading massive files.
Shared Cloud Folders: Google Drive, Dropbox, and OneDrive all support shared folders where multiple family members can access, download, and even contribute their own digitized videos. Set up a folder structure by year or event, invite family via email, and everyone benefits from a centralized archive.
Physical Media for Older Relatives: Not everyone is comfortable with cloud storage or streaming. Burn your digitized videos to DVDs or Blu-rays using a computer with an optical drive and software like Nero or Ashampoo. Include a printed label and case insert with the video's date and description. This thoughtful gesture means the world to relatives who prefer physical media.
Social Media Highlights: For milestone moments (anniversaries, birthdays, graduations), create short highlight reels (2-3 minutes) combining clips from multiple tapes. Use free editing tools like iMovie, DaVinci Resolve, or online options like Kapwing. Post to Facebook, Instagram, or family group chats to spark conversation and reconnection.
Memory Books and Slideshows: Pair your digitized videos with printed photo books featuring screenshots from the footage. Services like Shutterfly, Mixbook, and Artifact Uprising let you design custom books with embedded QR codes that link to the full video files. It's a hybrid approach that bridges physical and digital media beautifully.
Preserving Audio-Only Tapes: Expanding Beyond Video
Many families also have audio cassettes, vinyl records, or reel-to-reel tapes worth preserving. The RVT Digitizer 3.0's AUX input (3.5mm audio jack) makes it a versatile archiving tool beyond just video.
Cassette Tapes: Connect your cassette deck's headphone or line-out jack to the digitizer's AUX input using a 3.5mm cable (included). Press record on the digitizer, then play on your cassette deck. The audio is captured as part of the MP4 file (with a blank video track, or you can add a static image later in editing software).
Vinyl Records: If your turntable has a built-in preamp or headphone output, connect it directly to the digitizer. For turntables requiring an external preamp, add a preamp between the turntable and digitizer. This method captures the authentic warmth and crackle of vinyl for your personal music library.
Voiceover Narration: One creative use: record yourself or elderly relatives narrating what's happening in the video footage. Play the video on the digitizer's screen, speak into a microphone connected to the AUX input, and capture audio commentary alongside the original footage. This adds irreplaceable context to silent or poorly-recorded videos.
Interviews and Oral Histories: Use the digitizer to preserve family stories told by older generations. Record interviews about family history, immigration stories, wartime experiences, or recipes passed down through generations. These audio files become as valuable as visual media for future family members seeking to understand their roots.
Related Resources:
FAQS
Do I need a computer to convert VHS tapes to digital?
No. The RVT Digitizer 3.0 operates as a standalone device. Simply connect your VCR, insert a USB drive, and press record. The device saves MP4 files directly to your USB drive without requiring a computer, software, or technical knowledge.
How long does it take to convert a VHS tape?
VHS conversion happens in real-time, so a 2-hour tape takes 2 hours to digitize. This ensures maximum quality by capturing every frame exactly as it appears during playback. You don't need to monitor the process actively—just start the recording and return when it's complete.
Can I convert VHS to digital without a VCR?
No. The RVT Digitizer 3.0 captures video from a functioning VHS player—it doesn't play tapes itself. If you don't own a VCR, you can purchase a used one from thrift stores, eBay, or Facebook Marketplace for $20-50. Alternatively, borrow one from family or friends for the duration of your conversion project.
What file format does the RVT Digitizer save videos as?
The RVT Digitizer 3.0 saves videos as MP4 files with H.264 encoding—the most universally compatible format across all modern devices. MP4 files play seamlessly on Windows, Mac, iPhone, iPad, Android, smart TVs, and web browsers without requiring special software.
Can I connect the digitizer to my iPhone or Android phone?
Yes. The RVT Digitizer 3.0 includes a USB-C adapter that allows direct connection to iPhone 15+ and most modern Android devices. Once connected, you can view, copy, and share your digitized videos immediately using your phone's file manager or cloud storage apps like iCloud Photos or Google Photos.
How much storage do I need for converting VHS tapes?
A standard 2-hour VHS tape converts to approximately 3-4GB as an MP4 file. The included 32GB USB drive holds 8-10 hours of footage. For larger projects, consider upgrading to a 128GB drive (40+ hours) or transferring files to an external hard drive and reusing the same USB drive repeatedly.
Will the digitizer fix old, damaged VHS tapes?
The digitizer captures the best possible version of your tape's current condition—it doesn't repair physical damage. However, it preserves what remains before further degradation occurs. For severely damaged or moldy tapes, consult a professional restoration service before attempting conversion. Once cleaned or repaired, use the RVT Digitizer 3.0 to create a permanent digital backup.
Is it better to convert VHS myself or use a professional service?
For families with 10+ tapes, converting at home with the RVT Digitizer 3.0 is more cost-effective, faster, and keeps your private memories under your control. Professional services charge $15-30 per tape, making the digitizer a better investment that pays for itself after 6-12 conversions. You also avoid shipping delays and privacy concerns.
Can I edit my videos after converting them?
Absolutely. MP4 files are compatible with all major video editing software, including iMovie (Mac/iOS), Windows Video Editor, Adobe Premiere Pro, DaVinci Resolve (free), and mobile apps like InShot or CapCut. You can trim, enhance, add music, correct colors, and create highlight reels from your digitized footage.
What warranty does the RVT Digitizer 3.0 come with?
Every RVT Digitizer 3.0 includes a 2-year manufacturer warranty and a 30-day money-back guarantee. Texas-based customer support is available via phone and QR code video tutorials to assist with any technical questions or troubleshooting needs throughout your conversion project.
People Also Ask
Is it worth converting VHS to digital?
Yes—especially if those tapes contain irreplaceable family memories. VHS tapes degrade over time, losing color and clarity with each passing year. Digitizing preserves your memories permanently in a format that's easy to view, share, and back up. The emotional value alone makes conversion worthwhile, and the cost is minimal compared to professional services.
How long do VHS tapes last?
VHS tapes last 10-25 years under ideal storage conditions (cool, dry, away from magnetic fields). However, tapes stored in attics, basements, or garages often show degradation within 10-15 years. Symptoms include faded colors, tracking issues, and muffled audio. The longer you wait, the more quality you'll lose—digitize now while your tapes are still playable.
Can I convert VHS to DVD or Blu-ray?
Yes. After converting your VHS tapes to MP4 files using the RVT Digitizer 3.0, you can burn those files to DVD or Blu-ray using a computer with an optical drive and burning software like Nero, Ashampoo, or ImgBurn (free). This is ideal for family members who prefer physical media over digital files.
What happens to VHS tapes if I don't convert them?
Unconverted VHS tapes continue to degrade due to magnetic decay, humidity, temperature fluctuations, and physical wear. Within 20-30 years, most tapes become unplayable. Mold, sticky shed syndrome, and tape stretching are common issues. Worse, VCRs are becoming increasingly rare and expensive to repair. Every year you delay, the risk of permanent loss increases.
Can I watch VHS tapes on modern TVs?
Yes, but it requires a VCR and adapters. Most modern TVs lack RCA (composite) inputs, so you'll need an RCA-to-HDMI converter to bridge the connection. The RVT Digitizer 3.0 offers a better solution: convert your tapes to MP4 files, then watch them natively on your smart TV via USB drive or streaming apps like Plex. No adapters, no hassle.
Why do some VHS converters fail mid-recording?
Cheap USB-powered converters rely on unstable power from your computer's USB port, which fluctuates and causes dropouts. The RVT Digitizer 3.0 uses a dedicated wall power adapter (110-240V) to ensure consistent, uninterrupted power throughout the entire conversion process—even for multi-hour tapes.
How do I organize my digitized family videos?
Use a consistent file naming system like "YYYY-MM-DD_Event_Name.mp4" (e.g., "1995-07-04_Family_Reunion.mp4"). Create folders by year or person for easy navigation. Add metadata tags (birthday, vacation, etc.) if your operating system supports it. Store files across multiple locations: USB drive, external hard drive, and cloud storage for maximum protection.
Can I convert camcorder tapes using the RVT Digitizer 3.0?
Yes. Any camcorder with RCA or S-Video output (Hi8, Video8, MiniDV, VHS-C) can connect directly to the digitizer. Play the tape in your camcorder, connect the output to the digitizer's input, and record as you would with a VCR. This makes the RVT Digitizer 3.0 a versatile tool for all your family video formats.
Collection: Best VHS Converter for Old Family Videos
-
 Sale
SaleRVT Digitizer 3.0
Regular price $179.00Regular priceUnit price / per$220.00Sale price $179.00Sale
