
In 2026, analog video tapes are vanishing, but your memories don’t have to. Every year, more tapes break down and playback devices fade from shelves, putting cherished moments at risk.
If you want to keep family milestones, childhood laughter, and once-in-a-lifetime events safe, now is the time to transfer video to digital. This guide shows you every step, making sure your memories stay vivid and accessible for years to come.
You will discover which formats you have, why digitization matters, how to choose the right method, the best equipment, and how to future-proof your collection. Ready to preserve what matters most? Let’s get started.
Understanding Analog Video Formats in 2026
Preserving memories starts with knowing what you have. In 2026, many families are looking through closets and boxes, discovering stacks of old tapes and reels. To successfully transfer video to digital, it helps to recognize what kinds of analog formats might be hiding in your collection.
Overview of Common Legacy Video Formats
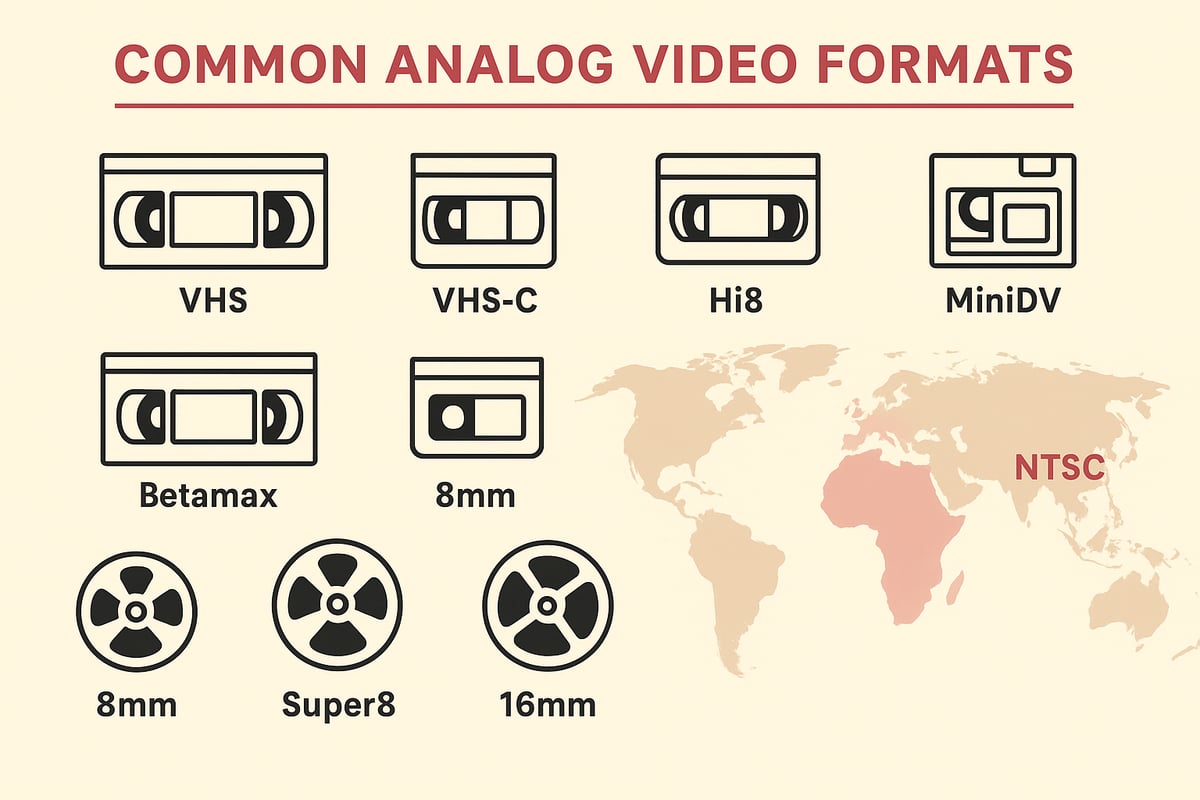
Households in 2026 still hold a surprising mix of analog formats. The most common are VHS tapes, easily recognized by their large black cases. VHS-C is a compact version, often found in camcorder recordings. Hi8 and MiniDV tapes are smaller, used mostly in late-90s and early-2000s camcorders. Betamax, though less common, appears in collections from the 1980s.
Beyond tapes, some families have film reels: 8mm, Super8, and 16mm. These are typically spooled on circular reels and require projectors, not VCRs. While tapes store video magnetically, film uses a physical image strip, making the transfer video to digital process different for each.
Internationally, you may see PAL or NTSC labels. PAL was standard in Europe and Asia, while NTSC covered North America and Japan. This matters when you transfer video to digital, since playback devices must match the tape's standard.
A typical home collection might include a mix: VHS for family movies, Hi8 for vacations, and a few dusty film reels of childhood birthdays. According to recent estimates, millions of households still own these tapes. If you want more detail on how to handle each type, the Transfer old tapes to digital guide covers methods for a variety of legacy formats.
The Risks of Waiting: Tape Degradation and Device Obsolescence
Analog tapes are not built to last forever. Over time, magnetic tapes lose their signal, causing colors to fade, audio to drop out, or images to disappear entirely. Mold, sticky-shed syndrome, and brittle tape can make playback impossible. This is why experts urge families to transfer video to digital before it's too late.
Playback equipment is another growing concern. VCRs and camcorders are now rare at thrift shops and online. Many units sold in 2025 were non-functional or unreliable, making it risky to rely on aging devices. If your player breaks, finding a replacement or repair can cost more than digitizing the tape itself.
Consider the cost of lost memories: a wedding tape ruined by mold, or a child's first steps trapped on a format no one can play. Professional repair is expensive and sometimes not even possible. By choosing to transfer video to digital now, you protect your family's history from being lost to time or technology.
Is it worth the risk to wait? For most, the answer is clear: act now, and ensure your memories live on.
Why Transfer Video to Digital Now?
Preserving old home movies is more urgent than ever. Analog tapes are fragile and aging quickly, putting decades of memories at risk. When you transfer video to digital, you give your family’s history new life and lasting security.
Preservation and Protection of Irreplaceable Memories
Analog tapes can only last so long. Over time, magnetic tape loses quality, color fades, and sound becomes distorted. If you wait too long, precious moments like weddings, birthdays, and childhood milestones could be lost forever.
When you transfer video to digital, you create a backup that can withstand fire, flood, or accidental damage. Digital files do not suffer from the same physical decay as tapes. In a recent survey, 70 percent of families said their main reason for digitizing was fear of losing memories.
Imagine finding a tape from your child’s first steps, only to discover it is unplayable. That heartbreak is avoidable. Many families are choosing to convert their home videos to digital formats to guarantee their memories survive for generations.
Enhanced Accessibility and Sharing
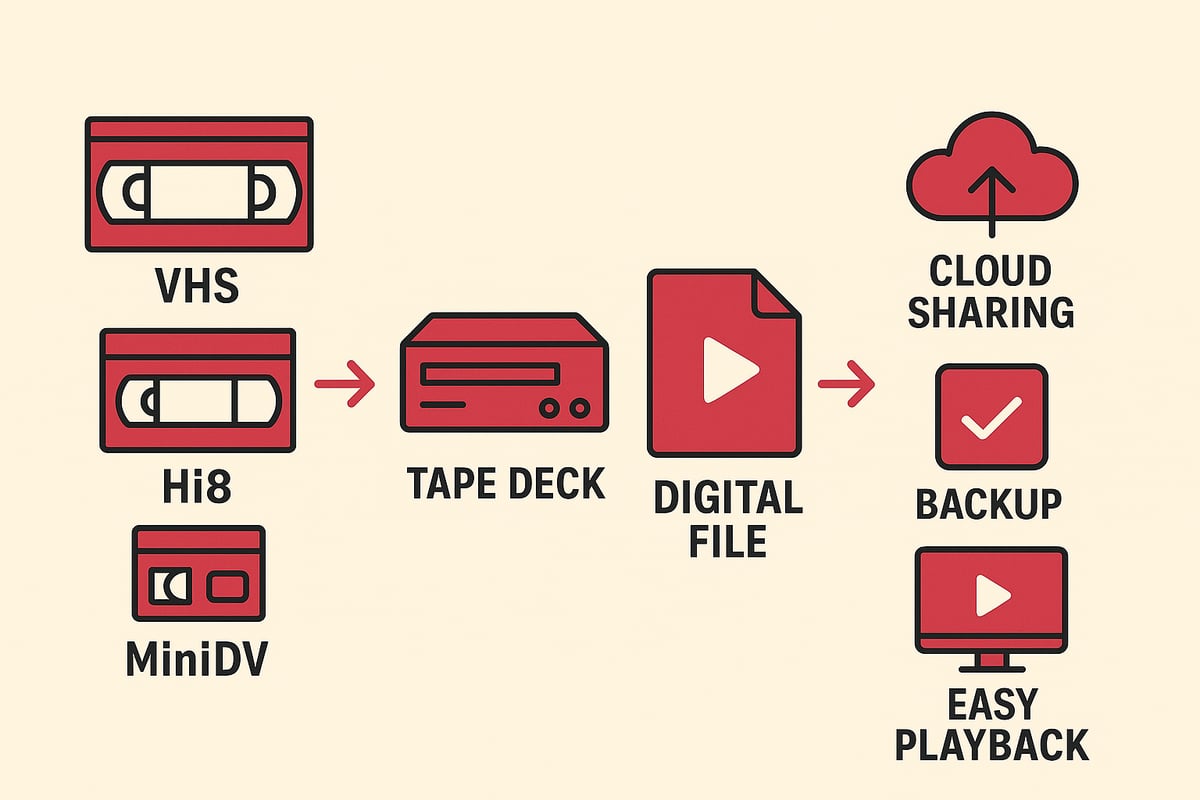
Once you transfer video to digital, your memories become instantly accessible. Digital files can be played on any computer, TV, smartphone, or tablet. There is no need to hunt for a working VCR or camcorder.
Sharing is simple. Send a cloud link, create a private YouTube playlist, or add clips to a digital frame for grandparents. Editing and organizing are easier, too. Highlight reels, family documentaries, and special remixes are just a few clicks away.
Picture a family movie night where everyone gathers around the smart TV to watch old footage, laughing and reminiscing. Digital formats make these moments possible, no matter where your loved ones are.
Added Value: Space Saving and Future-Proofing
Physical tapes take up boxes and shelves, but digital files fit neatly on a thumb drive or cloud account. When you transfer video to digital, you free up space in your home while ensuring your collection is ready for the future.
Digital files can be copied, backed up, and moved to new devices as technology changes. This future-proofing keeps your memories safe from hardware obsolescence. Eight out of ten people say they feel more at ease knowing their videos are protected and easily accessible.
Why risk losing something irreplaceable? Take action now to preserve, share, and safeguard your family’s story for decades to come.
Step-by-Step Guide: How to Transfer Video to Digital in 2026
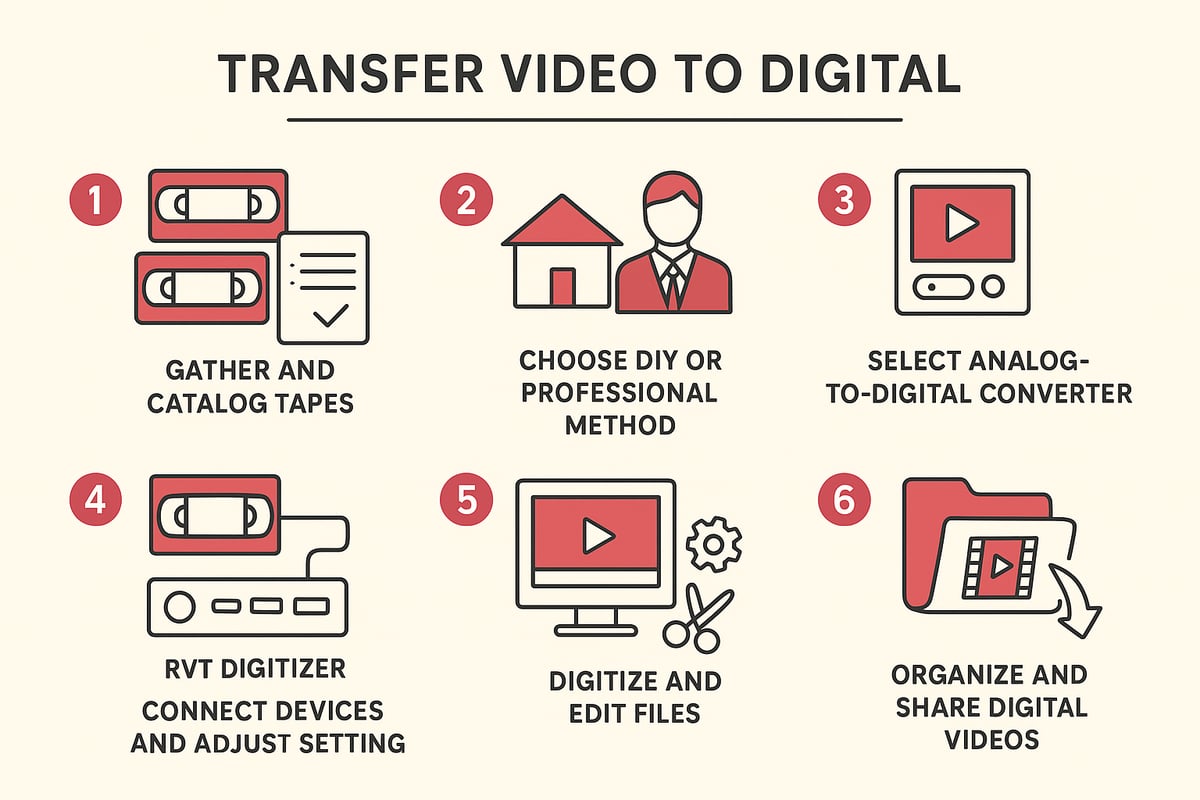
Preserving your memories begins with an organized, stepwise approach. This guide walks you through each stage to transfer video to digital, ensuring every milestone is simple, safe, and effective. Let’s break it down together.
Step 1: Inventory and Prepare Your Tapes
Start by gathering every tape, reel, and camcorder cassette you own. Place them on a table and sort by format—VHS, Hi8, MiniDV, or film reels. Create a simple spreadsheet listing each tape’s label, year, and event. This makes it easy to track your transfer video to digital progress and avoid missing hidden treasures.
Inspect each tape for dust, mold, or sticky residue. Gently wipe cases with a soft, dry cloth. If you spot white specks or sticky-shed, set those aside for professional cleaning. Label each tape clearly with names and dates to avoid confusion later.
Consider using a checklist app or simple table to monitor which tapes are ready, which need cleaning, and which are most urgent. This step sets you up for a smooth, stress-free transfer.
Step 2: Choose the Right Conversion Method
Now, decide whether to take the DIY route or use a professional service. DIY is ideal for small collections or if you value privacy. You’ll need a working playback device and a reliable converter. Professional services suit those with large, fragile, or rare tapes, or if you want to save time.
Compare costs and convenience. DIY methods usually cost less per tape but require your time. Professional digitization typically costs $20–$40 per tape in 2026 and includes cleaning, transfer, and digital delivery. If you want a more detailed walkthrough, check out this Step-by-step VHS to digital guide, which covers both DIY and service options.
Ask yourself: Do you prefer hands-on control, or is convenience your priority? Either way, your memories are worth the effort to transfer video to digital before tapes degrade further.
Step 3: Selecting the Best Equipment for DIY Transfers
If you opt for DIY, choosing the right hardware is crucial. You’ll need a playback device (VCR or camcorder in working order), an analog-to-digital converter, and the right cables. Not all converters are equal—picture and sound quality vary widely.
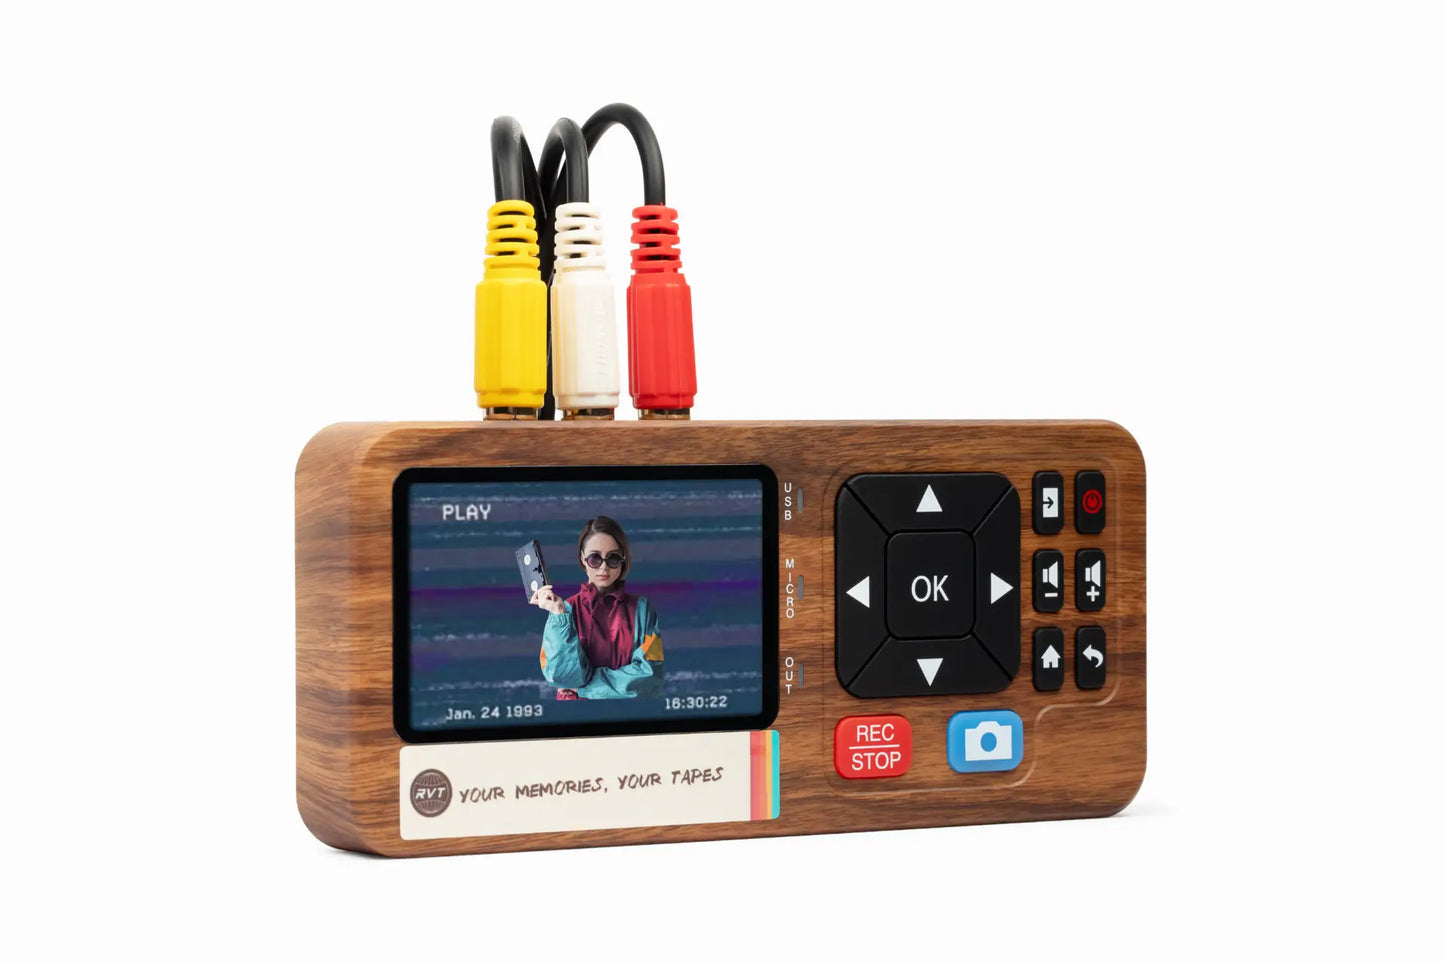
The RVT Digitizer is the industry benchmark for VHS to digital conversion. Its advanced encoding chip delivers superior clarity, accurate color, and fast transfer speed. Plug-and-play setup means you don’t need technical expertise. Unlike generic converters, the RVT Digitizer offers professional-grade build and reliability, trusted by families and creators for priceless home movies.
Check compatibility: ensure the converter supports your tape type—VHS, Hi8, MiniDV, or others. Compare generic USB converters and you’ll see the RVT Digitizer consistently outperforms in clarity and ease of use. For those seeking the best results, this device preserves your memories with unmatched fidelity when you transfer video to digital.
Step 4: Setting Up for a Successful Transfer
Once you’ve chosen your equipment, connect your playback device to the converter, then plug the converter into your computer or even smartphone if supported. Use high-quality cables for the cleanest signal. Launch your chosen capture software—most converters come with their own, but built-in OS options or free apps work too.
Adjust settings for optimal results: select MP4 format, set resolution to match the original tape, and check audio sync. Monitor the process in real time so you can spot issues like dropped frames or audio distortion early.
A quick test run with a short tape is wise before you begin to transfer video to digital in bulk. This saves time and helps avoid disappointment later.
Step 5: Digitizing, Editing, and Saving Files
Begin the real-time digitization process. Watch as your memories play and are captured digitally. Stay nearby to catch glitches or interruptions. When finished, save files in MP4 format, the 2026 standard for quality and compatibility.
Now, edit your videos. Trim blank sections, adjust color, and fix brightness if needed. Organize files by year, event, or family member. Regularly back up your files to an external drive and a cloud account. Always keep at least two copies—never risk losing your digital archive.
If you want to streamline the process, the RVT Digitizer makes it easier to transfer video to digital with fewer errors and better results than budget alternatives. Prioritize editing and backup for long-term peace of mind.
Step 6: Organizing and Sharing Your Digital Videos
With your files digitized, it’s time to organize and share. Create folders by event, year, or family member. Add metadata, tags, or short descriptions to each file for easy searching. This makes reliving special moments a breeze.
Share your digital videos with loved ones. Use cloud links, private YouTube or Vimeo channels, or load files onto digital photo frames and smart TVs. Imagine a family movie night playlist created from decades-old tapes—now easily accessible, safe, and ready to enjoy.
When you transfer video to digital thoughtfully, you don’t just protect memories; you make them easy to revisit and share for generations. What story will you preserve first?
Choosing the Best Analog-to-Digital Converter in 2026
Selecting the right converter is the key to a smooth and successful transfer video to digital process. With so many devices on the market, how do you ensure your memories are preserved with the clarity, color, and sound they deserve? Let’s break down what truly matters in 2026 when choosing a converter for your home movies.
What to Look for in a Converter: Quality, Compatibility, and Ease of Use
When you set out to transfer video to digital, start by focusing on the essentials. The right converter should deliver clear video, crisp audio, and be effortless to set up. Compatibility is crucial—make sure your device supports your specific tape formats, whether VHS, Hi8, MiniDV, or Betamax.
Here’s a quick comparison of must-have features:
| Feature | Why It Matters | What to Look For |
|---|---|---|
| Video Clarity | Preserves precious details | Advanced encoding, high bitrate |
| Color Accuracy | Keeps footage true to life | Superior chip, color stability |
| Audio Fidelity | Maintains voices and music | Noise reduction, stereo support |
| Device Compatibility | Works with all your tech | PC, Mac, smartphone ready |
| Ease of Use | Less hassle, faster results | Plug-and-play, simple controls |
User reviews and expert guides can help you compare real-world performance and satisfaction. If you want to explore more options, check out this Best video-to-digital converters guide for up-to-date recommendations.
Choosing a reliable converter up front means you can transfer video to digital without frustrating setbacks or risking your tapes.
RVT Digitizer: The Industry Benchmark for VHS to Digital Conversion
For families and collectors who want flawless results, the RVT Digitizer stands out as the gold standard to transfer video to digital. Its advanced encoding chip captures every detail, delivering superior picture clarity and preserving the original colors of your memories.
Setup is refreshingly simple. Just connect your VCR or camcorder, plug in the RVT Digitizer, and you’re ready to go—no complicated software or technical skills required. Transfers are fast and reliable, so you can convert entire tape collections in less time.
The professional-grade build ensures durability and consistent results, even with repeated use. Sound fidelity matches the original recording, so laughter, music, and voices remain vibrant for generations.
Many families share stories of rediscovering old birthdays, graduations, and wedding footage with the RVT Digitizer. Creators and archivists also count on its precision engineering and U.S.-based support. Customer ratings highlight its ease of use and the peace of mind that comes with a 2-year warranty.
Unlike budget converters that can cause color shifts or audio hiccups, RVT Digitizer consistently delivers archival-grade results. Why settle for less when you can trust the device designed for lifelong preservation?
Other Noteworthy Converters and Professional Services
If you have rare tape formats or a large number of tapes to transfer video to digital, other reputable converters and professional services are available. Some converters offer good results for basic needs, but may lack advanced features like color correction or high-speed transfer.
Professional digitization services provide mail-in kits, handle fragile or damaged tapes, and return your videos as organized digital files. Turnaround times average 4–6 weeks, with safety protocols to protect your originals.
Consider professional help if you’re dealing with sticky-shed syndrome, mold, or tapes in poor condition. These services often offer digital restoration, extra copies, and cloud delivery for added convenience.
Whether you choose a trusted device or a service, make sure your solution makes it easy to transfer video to digital and protects your memories for years to come.
Best Practices for High-Quality Video Transfers
Preserving your family’s memories takes more than just hitting record. To truly transfer video to digital with lasting quality, follow these best practices. With the right preparation and approach, you’ll protect every smile and milestone for decades to come.
Preparing Tapes and Equipment
Start by gathering all your tapes and camcorder media. Inspect each one for visible damage, dust, or signs of sticky residue. Cleaning is critical, since dirt or mold can harm playback or damage your equipment. If you notice sticky or gummy tape, you may be dealing with sticky-shed syndrome, which can ruin transfers if not addressed.
Test your VCR or camcorder before starting the transfer video to digital process. Use a known-good tape to check for playback issues. Clean the heads and rollers with an approved solution or cleaning tape. Use only high-quality RCA or S-Video cables to minimize signal loss and interference.
Optimizing Capture Settings
Before you transfer video to digital, adjust your capture settings for the best results. Set your converter and software to capture at the highest resolution your tapes support. Fine-tune color, brightness, and contrast to match the original footage, preserving natural skin tones and details.
The RVT Digitizer is the industry benchmark here. Its advanced encoding chip ensures superior picture clarity and color accuracy, while fast transfer speed saves you time. Real-time monitoring lets you catch any dropped frames or audio sync issues instantly. This level of control is hard to match with generic converters.
Editing and Enhancing Digitized Videos
After you transfer video to digital, review your files for blank sections, static, or unwanted noise. Use basic editing tools to trim, improve color, and stabilize shaky footage. Enhance sound quality and add simple titles, dates, or family names for context.
With the RVT Digitizer, you’ll notice less need for heavy editing, thanks to its precise color and sound fidelity. Still, a few touch-ups can make your memories shine. Don’t forget to organize videos into folders by event or year so you can find them easily later.
Safe Storage and Backup Strategies
Once you transfer video to digital, protect your files with multiple backups. Save copies to an external hard drive, a cloud service, and, if possible, an offsite location. Organize your digital library with clear folder names and add notes or tags for quick searches.
Remember, 90 percent of digital loss incidents happen because people skip backups. Regularly check your storage devices to ensure everything works. A simple backup system means your digital memories will last for generations, safe from accidental deletion or hardware failure.
Future-Proofing Your Digital Memories
Preserving your memories is not just about converting tapes. It's about ensuring that your digital files stay safe, accessible, and meaningful for years to come. As you transfer video to digital, a few smart choices today can protect your family’s legacy for the next generation.
Choosing the Right File Formats and Storage Solutions
When you transfer video to digital, the file format you pick matters. In 2026, MP4 and MOV are the safest bets. They play on nearly any device, so you avoid the risk of old, unsupported formats. Proprietary files can lock you out as software changes.
Storage is just as important. Use high-capacity solid-state drives or a reliable NAS for local backup. Cloud storage adds another layer of safety, letting you access memories from anywhere. Regularly move your files to newer drives as technology advances. This way, you avoid the heartbreak of lost footage due to outdated media or failed hardware.
Tape degradation is a real threat, as outlined in Degradation of magnetic tape: Support and binder stability. Digital storage, when managed well, offers peace of mind for decades.
Organizing and Cataloging for Generations
Once you transfer video to digital, organization becomes your best friend. Start by grouping files into folders by year, event, or family member. Add metadata, like dates and descriptions, for easy searching later.
Consider creating digital albums or highlight reels. These can turn hours of footage into watchable, shareable stories. A well-organized digital archive is a gift to future generations. Imagine your grandchildren easily finding their parents’ childhood moments, thanks to your careful cataloging.
Simple tools, like spreadsheets or photo management apps, can help you track and update your growing archive. Being methodical now saves time and confusion down the road.
Sharing and Access Across Devices and Platforms
Digital files shine because they are easy to share. After you transfer video to digital, set up cloud folders or private links for family members. This makes it simple for relatives near and far to watch cherished moments on their TVs, tablets, or phones.
Compatibility is key. MP4 files play on almost anything, from smart TVs to digital frames. Private family cloud libraries or even a digital time capsule ensure everyone in the family can access your archive. No more hunting for a working VCR or camcorder.
Sharing not only spreads joy, it also creates extra copies of your memories, adding another layer of protection.
Planning for Long-Term Preservation
Long-term preservation is about more than just storage. Schedule periodic checks to ensure files open and play correctly. Refresh your backups every few years to prevent bit rot or corruption.
Pass on your digital archive with clear instructions for the next generation. Explain the importance of regular migration and multiple backups. As highlighted in History and Culture of the 1960s to 1980s Is Disintegrating With the Tapes That Recorded It, neglecting this step risks losing irreplaceable history.
When you transfer video to digital using a trusted solution like the RVT Digitizer, you’re investing in clarity, stability, and the confidence that your memories will last. Isn’t it time to future-proof your family’s story?
We’ve talked about how quickly old tapes can fade and how digital files keep your stories safe for generations. Imagine sharing those childhood birthdays or epic game nights in stunning clarity—no more worrying about broken VCRs or lost memories. With the right converter, you can protect every laugh, every milestone, and every piece of your family’s history. Why wait and risk losing what matters most? Let’s make sure those moments last forever. Ready to get started and see just how easy it is to preserve your memories? Digitize my tapes today