
Imagine watching your family’s best moments come alive again, brighter and clearer than ever. Old tapes may fade, but your memories deserve to last.
This guide is here to help you master video transfer in 2026. You’ll learn how to protect, access, and share those precious recordings, so nothing gets lost to time.
Why is this so important? We’ll look at the emotional value, the risks of waiting, and the smartest ways to preserve every milestone. Ready to save your story for future generations? Let’s get started.
Why Video Transfer Matters in 2026
Imagine pulling out an old tape, only to realize your family’s laughter and first steps are fading fast. That’s why video transfer has never been more important. In 2026, we’re not just talking about saving footage—we’re talking about protecting legacies for the next generation.
The Emotional and Historical Value of Home Videos
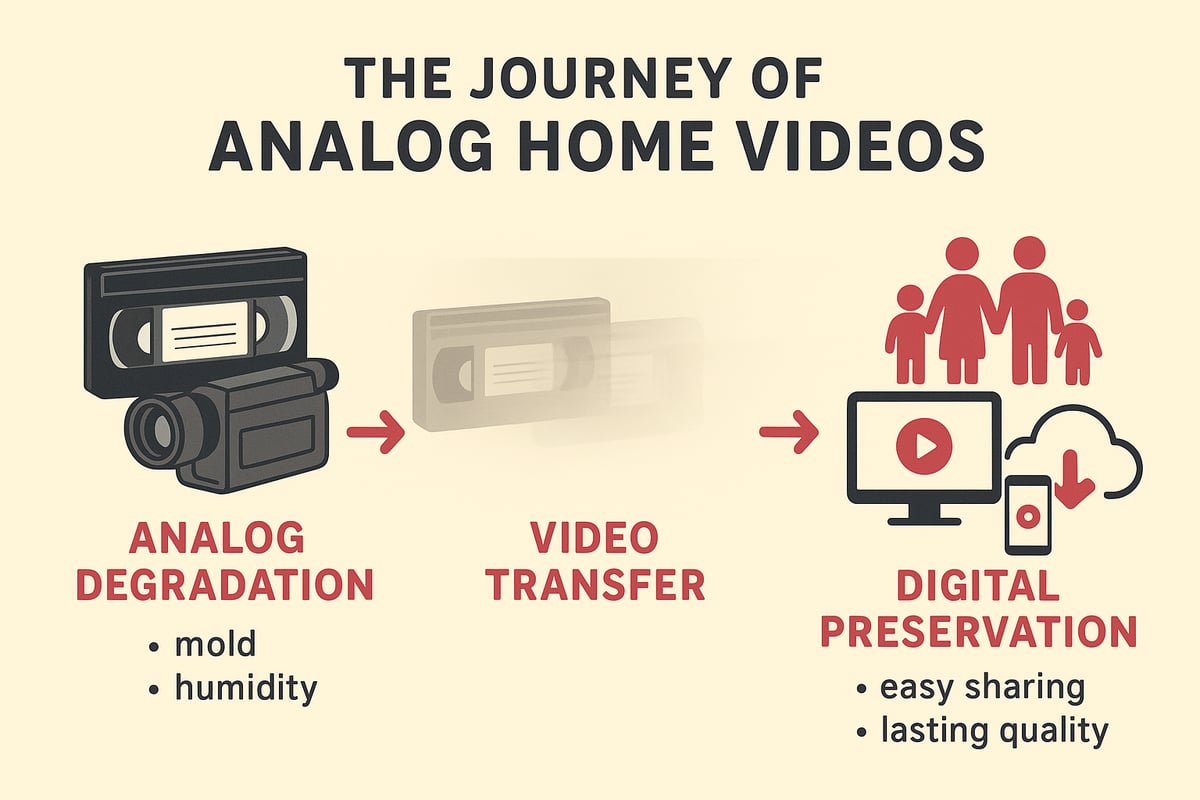
Home videos are more than just recordings—they’re living time capsules. Birthdays, holidays, and everyday moments captured on analog tapes tell your family’s story. Many families have rediscovered lost smiles and voices by completing a video transfer project.
These memories are irreplaceable. Once lost, you can’t rewind time. Stories of grandparents’ voices or a child’s first steps are treasures. Preserving them means passing on laughter, lessons, and love.
If you want to dive deeper into preserving these moments, check out Preserving Home Videos Digitally for tips on making sure your memories last.
Risks of Analog Media Degradation
Analog tapes are not built to last forever. Over time, VHS, Hi8, and MiniDV tapes lose color, sound, and sharpness. Most magnetic tapes start to break down after 10 to 30 years. Environmental threats like humidity, mold, and mechanical wear can destroy footage.
- Loss of image clarity
- Warped or muffled audio
- Mold growth on tape surface
- Tapes sticking or breaking
Many families discover too late that precious moments are gone. Video transfer is your safety net, rescuing memories before they vanish.
The Digital Advantage
Digital files unlock a world of convenience. With video transfer, you can instantly access, share, and organize your memories. Duplicating and backing up digital footage is simple, keeping your videos safe even if a device fails.
- Instant sharing with family anywhere
- Easy editing to create highlight reels
- Secure storage in the cloud or on drives
You’ll enjoy peace of mind knowing your memories are protected, fully editable, and preserved in crystal-clear quality for the future.
The 2026 Landscape: Why Now?
Every year, working VCRs and camcorders become harder to find. Modern devices no longer support analog inputs, making video transfer urgent. Social media and creative projects are fueling demand for digital content.
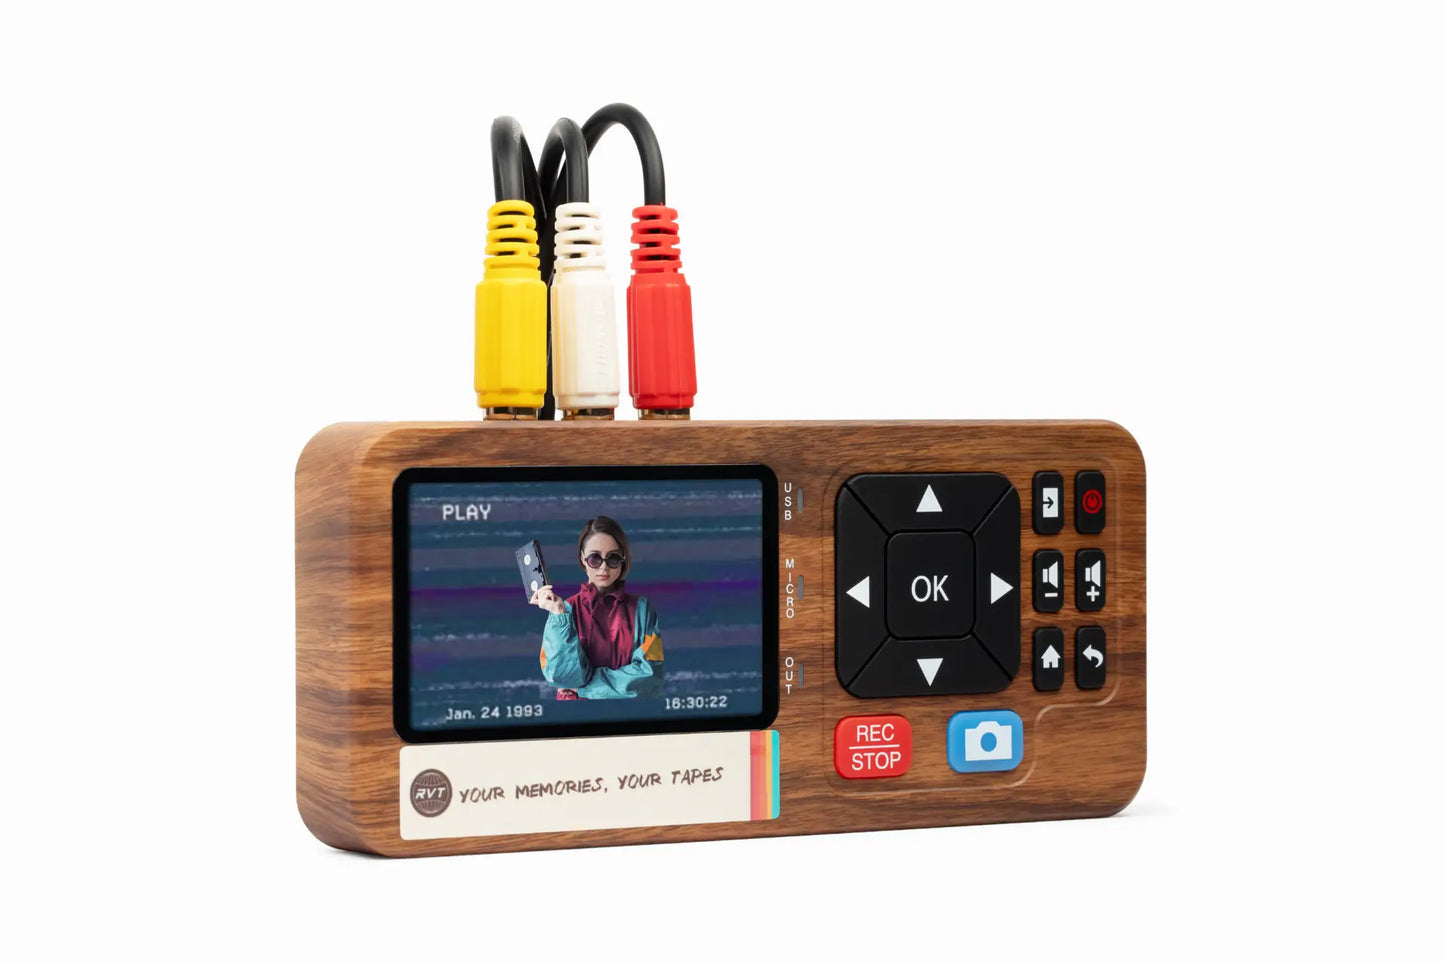
Industry trends show more families turning to digitization services and advanced solutions like the RVT Digitizer. Its unmatched clarity, fast setup, and long-term stability set the standard for converting analog tapes to digital today.
Don’t wait until your equipment fails. The best time for video transfer is now, before another memory slips away.
Understanding Video Formats & What You Can Transfer
Preserving your memories starts with understanding the types of tapes and reels hiding in closets and boxes. Each format holds moments worth saving, and with the right video transfer approach, you can bring those memories into the digital age—safe, organized, and ready to share.
Common Analog Video Formats
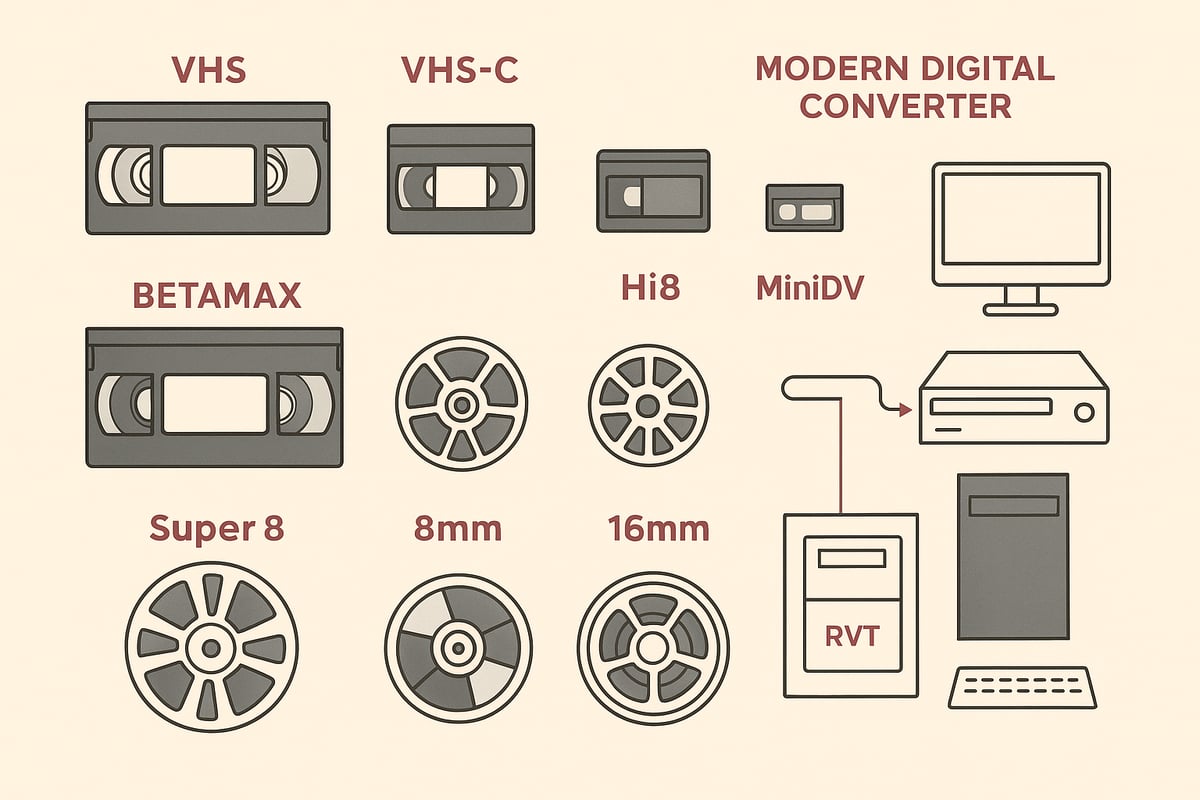
Home movies come in many shapes and sizes. The most common analog formats include VHS, VHS-C, Betamax, Hi8, Video8, Digital8, MiniDV, and MicroMV cassettes. Film reels like Super8, 8mm, and 16mm are found in older collections, while audio cassettes or reel-to-reel tapes often hold soundtracks or special messages.
Here’s a quick format comparison:
| Format | Years Popular | Typical Use |
|---|---|---|
| VHS | 1980s–2000s | Home movies, TV |
| Hi8 | 1990s–2000s | Camcorder footage |
| MiniDV | 1995–2010 | Digital camcorders |
| Betamax | 1975–1990 | Early home video |
| Super8/8mm | 1960s–1980s | Silent/color films |
| 16mm | 1930s–1970s | Professional/School |
For a deeper dive into the technical side of analog-to-digital conversion, see the Video to Digital Converter Guide.
How to Identify Your Tapes and Media
Not sure what’s in your box of tapes? Look for clues like cassette size, label markings, and tape width. VHS tapes are large and usually labeled, while MiniDV and Hi8 are smaller, often marked with camcorder brand names.
Tips for sorting:
- Group tapes by size and label type
- Check for handwritten notes or dates
- Use a spreadsheet or photo catalog to track what you have
Knowing exactly what you’re working with makes planning your video transfer much easier and helps avoid missing hidden gems.
Format-Specific Challenges
Each format brings unique hurdles for video transfer. VHS tapes may have color fading or tracking issues. MiniDV and Hi8 can suffer from signal dropouts. Film reels need careful handling, and some require splicing or cleaning before transfer.
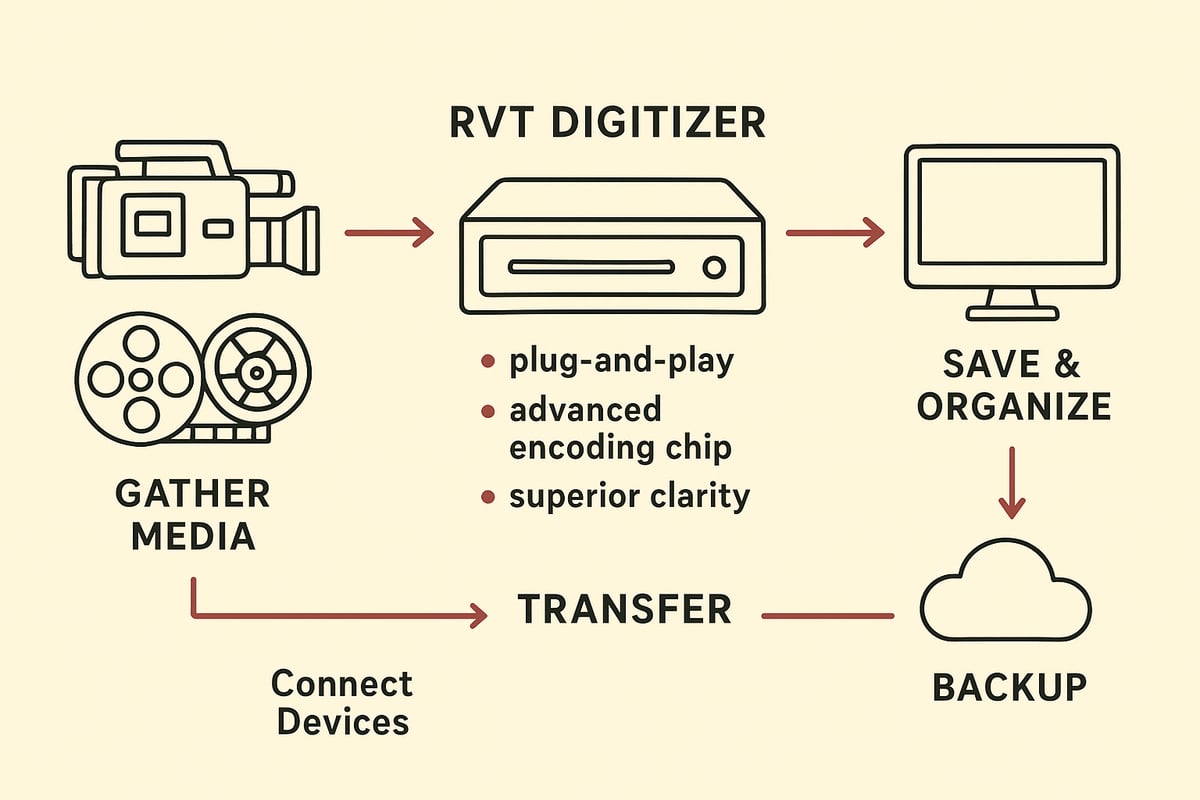
PAL and NTSC compatibility can also be a headache for international tapes. The RVT Digitizer stands out by handling a wide range of formats with plug-and-play simplicity, advanced encoding, and superior picture clarity—making it the trusted choice for families and collectors who want reliable results over generic converters.
What’s Transferable in 2026
Nearly all analog video and audio formats can be digitized with the right gear. From VHS and Hi8 to rare or proprietary tapes, most memories are still within reach. Some unusual formats may require a specialty service, but solutions like the RVT Digitizer cover the vast majority of home collections.
Whether you’re converting PAL VHS to NTSC digital, or preserving early camcorder tapes, today’s technology—especially premium devices—ensures your video transfer delivers the best possible quality for years to come.
The Importance of Complete Archiving
Video transfer isn’t just about moving footage from tape to computer. It’s about capturing every detail—audio, titles, written notes, and even the original packaging. Digitizing labels and inserts preserves context and family history.
Take time to archive these extras. They add color and meaning to your digital collection, making your preserved memories richer and more complete. Ready to start organizing your family’s story?
Choosing the Right Video Transfer Method
Preserving your family’s memories starts with choosing the right video transfer method. The best path depends on your collection size, technical comfort, and the quality you want. Let’s compare your options and see why the RVT Digitizer stands out for reliable, vivid results.
DIY Video Transfer: Pros, Cons, and Requirements
If you enjoy hands-on projects, DIY video transfer can be rewarding. This method typically requires a working VCR or camcorder, a USB capture device, cables, and a computer with enough storage. You’ll need patience and some tech know-how to set up and monitor the process.
The main advantage is cost savings, especially for large collections. However, risks include tape damage, loss of quality, or sync issues if settings are off. Many families start with DIY but encounter dropped frames or audio glitches, especially with aging tapes or unfamiliar equipment.
DIY video transfer is best for those comfortable troubleshooting and willing to invest time. If your tapes are rare or fragile, consider safer alternatives. Want to see step-by-step instructions and tips? Check out this Copying VHS to Digital Methods guide for practical advice.
Professional Video Transfer Services
Professional video transfer services, including national brands and local shops, offer expertise, industrial-grade equipment, and streamlined processes. You send your tapes in, and specialists handle cleaning, repair, and digitization.
The major benefits are high-quality results and peace of mind, especially for irreplaceable footage. Services like Legacybox and others have helped over a million families digitize their collections. Downsides can include higher costs, shipping risks, and waiting several weeks for completion.
If you have rare formats or want a hands-off experience, professionals are a great choice. For a deeper look at what these services offer, explore Understanding Video Tape Transfer Services.
Home Conversion Devices: Plug-and-Play Solutions
Home conversion devices bridge the gap between DIY and professional options. These devices connect your VCR or camcorder to your computer or phone, making video transfer accessible without deep technical skills.
Most plug-and-play digitizers are simple to set up. However, the quality varies widely. Generic models often produce washed-out images or audio lag. Premium converters, like the RVT Digitizer, deliver sharper clarity and more reliable results.
Home devices work well for families with multiple tapes who want control and convenience. Always compare reviews, build quality, and compatibility before investing. The right device makes video transfer fast and frustration-free.
RVT Digitizer: The Industry Benchmark for VHS to Digital
The RVT Digitizer sets the standard for video transfer in 2026. Its advanced encoding chip preserves picture clarity, color accuracy, and sound fidelity, capturing every moment just as you remember.
Plug-and-play simplicity means no drivers or complex setup. It is instantly recognized by PCs, Macs, and smartphones. Its professional-grade build ensures durability, accurate frame capture, and minimal signal loss.
Families, creators, and collectors trust the RVT Digitizer for lifetime reliability. U.S.-based support, a 2-year warranty, and a satisfaction guarantee offer peace of mind. Many users have compared RVT to generic converters and found the difference striking: sharper images, better sound, and a smoother transfer process.
Key Decision Factors
When selecting a video transfer method, weigh your budget, the number of tapes, and your comfort with technology. Consider if you want to edit, share, or create archival backups. Think about privacy and the sensitivity of your content.
Here’s a quick table to help you compare:
| Method | Cost | Quality | Time | Best For |
|---|---|---|---|---|
| DIY | Low | Varies | High | Tech-savvy, large sets |
| Professional Service | Higher | Best | Longer | Rare, fragile, premium |
| RVT Digitizer | One-time | Superior | Moderate | Most families, creators |
A real-world example: One family tried DIY video transfer, struggled with dropped frames, then switched to the RVT Digitizer. Their results improved instantly, and they finished their project in half the time. Another collector with rare tapes used a professional service for peace of mind.
No matter your choice, act soon to prevent further tape degradation. The right video transfer method safeguards your memories for future generations.
Step-by-Step Guide: How to Transfer Videos to Digital in 2026
Preserving your family’s memories starts with a clear, simple plan. Follow these steps for a successful video transfer that keeps your stories safe for generations. Whether you have a box of old tapes or film reels, you’ll find a path that fits your needs.
Step 1: Gather and Prepare Your Media
Begin your video transfer journey by collecting every tape, reel, and audio cassette you want to preserve. Sort through closets, boxes, and drawers. Don’t forget about old camcorder tapes or film reels hiding in storage.
Inspect each item for dust, mold, or damage. Clean gently with a soft cloth. Repair or splice film if needed. Label everything with dates or event names for easy tracking.
For larger collections, create a spreadsheet or use barcodes to keep things organized. Tracking details now will save hours later. Are you surprised by how many memories you find?
Step 2: Choose Your Equipment or Service
Next, decide how you’ll handle your video transfer. Check if your VCR or camcorder still works. For best results, especially with VHS, Hi8, or MiniDV, the RVT Digitizer stands out as the industry benchmark.
It offers superior picture clarity, fast transfer speed, and a plug-and-play setup. Families, creators, and collectors trust it for preserving color accuracy and sound fidelity. If you prefer a professional service, compare local shops or mail-in kits.
Consider your budget, collection size, and comfort with technology. With the right choice, your video transfer will be smooth and stress-free.
Step 3: Setup and Connect Devices
Connect your video source to the digitizer. With the RVT Digitizer, simply use RCA or S-Video cables to link your VCR or camcorder to the device, then plug into your computer or phone. No drivers or complex software needed.
Open the included software if required, or use your device’s built-in recording tool. Test the setup with a short video transfer to check for signal and quality. If issues appear, double-check connections and try another tape.
Here’s a quick troubleshooting table:
| Issue | Solution |
|---|---|
| No signal | Check cables and power |
| Poor color | Clean heads, use new cables |
| Dropped frames | Close other apps, test tape |
A smooth setup ensures your video transfer starts on the right foot.
Step 4: Begin the Transfer Process
Now, begin the actual video transfer. Start recording, watching for errors or interruptions. Monitor the process, especially if you’re transferring long tapes.
For best results, clean your VCR heads and use high-quality cables. Avoid pausing or stopping midway. Most transfers happen in real time; a two-hour tape takes two hours to digitize.
Families often find this step nostalgic. Watching old footage as you transfer can spark wonderful memories. The RVT Digitizer’s advanced encoding chip ensures every frame is captured with clarity and stability, outclassing generic converters.
Step 5: Save, Name, and Organize Digital Files
Once your video transfer is complete, save files in widely supported formats like MP4 or MOV. Use clear, consistent names with dates and events:
1998_SummerVacation_JonesFamily.mp4
2002_Graduation_Sarah.mov
Organize files in folders by year or occasion. Back up immediately to cloud, external drives, or both. For best practices on organizing and archiving, consult the Library of Congress guidelines for personal video archiving.
Add descriptions or tags so future generations know the story behind each clip. Proper organization makes your digital collection easy to enjoy and share.
Step 6: Edit, Enhance, and Share Your Memories
With files saved, you can enhance and share your memories. Basic editing lets you trim unwanted sections, join clips, or add titles. Try adjusting color or sound for a polished look.
Advanced users might use noise reduction or stabilization tools. Share finished videos with family using cloud services, social media, or by creating USB drives or DVDs.
Many families create highlight reels or digital archives to celebrate milestones. Editing brings your video transfer full circle, turning raw footage into lasting stories.
Step 7: Store Originals and Digital Copies Safely
Finally, protect both your original tapes and new digital files. Store tapes in a cool, dry, dark place as a backup. Keep digital copies in multiple locations—cloud, external drives, or offsite storage.
Follow the 3-2-1 backup rule: three copies, two types of media, one offsite. Periodically check files for integrity and consider migrating to new formats as technology evolves.
With the right habits, your video transfer efforts will last a lifetime. What story will you preserve next?
Ensuring Long-Term Preservation of Your Digital Memories
Preserving your memories does not end when your video transfer is done. The real challenge is ensuring that your digital files remain safe, accessible, and meaningful for years to come. Let’s walk through the best ways to protect your family’s milestones and stories after the transfer process.
Best Practices for Digital Archiving
After video transfer, choose high-quality, widely supported formats like MP4 or MOV. These formats ensure your memories can be opened in the future without special software.
Maintain detailed documentation for each file. Add dates, people, and event descriptions as metadata or in a spreadsheet. This context transforms your digital videos into a true family archive.
Follow expert recommendations, such as the CARLI guidelines for digitizing analog video, to maximize preservation quality. The RVT Digitizer simplifies this process by producing files with accurate color, sound, and stable encoding, making archiving straightforward.
The Role of Cloud Storage and Redundancy
Once your video transfer is complete, avoid keeping files in just one place. Back up your files to at least two different types of storage, such as cloud services, external drives, or DVDs.
Cloud storage offers easy access and quick sharing with family, plus protection from disasters like fire or theft. Still, always maintain a copy locally. Subscription costs and privacy are important to consider, so review your provider’s policies.
The RVT Digitizer creates reliable files that are easy to upload to any cloud system, ensuring your memories are protected and always within reach.
Avoiding Common Pitfalls
Many families lose digital memories by relying on a single backup or neglecting regular checks. After video transfer, set reminders to verify your files every few months. If you spot corrupted or missing videos, restore them from your backup.
Keep your documentation updated. Record when and how each video transfer happened. Don’t forget to label drives, folders, and files for easy tracking. This habit prevents confusion down the line.
Families who use the RVT Digitizer often find organizing their collections easier, thanks to its consistent file naming and quality output.
Future-Proofing Your Memories
Technology changes fast. After your video transfer, plan to revisit your archive every few years. Migrate files to new formats or storage devices before old ones become obsolete.
Stay informed about new preservation tools. For advanced security, systems like ARCHANGEL: Blockchain-based video archive integrity offer innovative ways to verify the authenticity of your digital collection.
Encourage your family to participate in maintaining the archive, sharing memories, and updating records. With RVT Digitizer’s archival-grade results and durability, your memories are set for the long haul. Ready to take the next step in protecting your legacy?
Comparing Top Video Transfer Solutions in 2026
Preserving your memories starts with choosing the right video transfer solution. With so many options available in 2026, it’s easier than ever to convert old tapes, but finding the best fit for your family or creative needs can make all the difference.
Professional Services vs. Home Solutions
When it comes to video transfer, professional services like Legacybox or local shops promise peace of mind with expert handling, high-end equipment, and support for rare formats. These services are ideal for those who want a hands-off approach or need help with specialty tapes.
Home solutions, on the other hand, put you in control. You can digitize tapes on your own schedule and keep your originals close. However, DIY methods require working equipment and know-how. If your tapes have started to deteriorate due to issues like sticky-shed syndrome in magnetic tapes, acting quickly is crucial to avoid permanent loss.
Home Digitizers: What to Look For
Not all home video transfer devices are the same. Many families start with basic converters, but quickly notice blurry images, color issues, or dropped frames. The RVT Digitizer stands out here. It delivers crystal-clear picture quality, precise color, and reliable sound, all with a simple plug-and-play setup.
Unlike generic options, the RVT Digitizer is built for long-term use, supporting every major tape format. Families and creators say it saves time, reduces frustration, and delivers results they’re proud to share.
Cost Breakdown and Value Analysis
Comparing video transfer costs helps you see where your investment goes. Professional services typically charge $20–$50 per tape, which adds up for larger collections. Home digitizers like the RVT Digitizer require a one-time purchase, paying for themselves after a few boxes of tapes.
| Solution | Upfront Cost | Per Tape Cost | Turnaround | Editing Options | Long-Term Value |
|---|---|---|---|---|---|
| Professional | Low | High | Weeks | Limited | Good |
| Generic Device | Low | Low | Instant | Basic | Fair |
| RVT Digitizer | Medium | None | Instant | Advanced | Excellent |
Key Features Checklist for 2026
Choosing a video transfer method? Use this checklist:
- Supports VHS, Hi8, MiniDV, and more
- Offers digital output (USB, cloud, DVD)
- Delivers sharp picture, true color, and clear sound
- Easy to set up and use, even for beginners
- Includes warranty and responsive support
- Protects your privacy and keeps content secure
The RVT Digitizer meets all these needs, making it the preferred choice for many.
Making the Best Choice for Your Needs
To find the best video transfer solution, consider your collection’s size, your comfort with technology, and your preservation goals. Want the highest quality and least hassle? The RVT Digitizer offers unmatched clarity, speed, and reliability, trusted by families and collectors alike.
Ready to preserve your memories? Start today and ensure your family’s moments are safe, accessible, and ready to share for years to come.
As you’ve seen, keeping your family’s most precious memories safe doesn’t have to be complicated or risky. With the right tools, you can easily bring old tapes back to life, share them with loved ones, and make sure they’re protected for years to come. The RVT Digitizer makes it simple—just plug in, press record, and watch forgotten moments reappear in stunning clarity. Why let your stories fade away when you can preserve them forever? Ready to take the next step and see how easy it is to capture your history? Digitize my tapes today